Friday, August 18, 2017

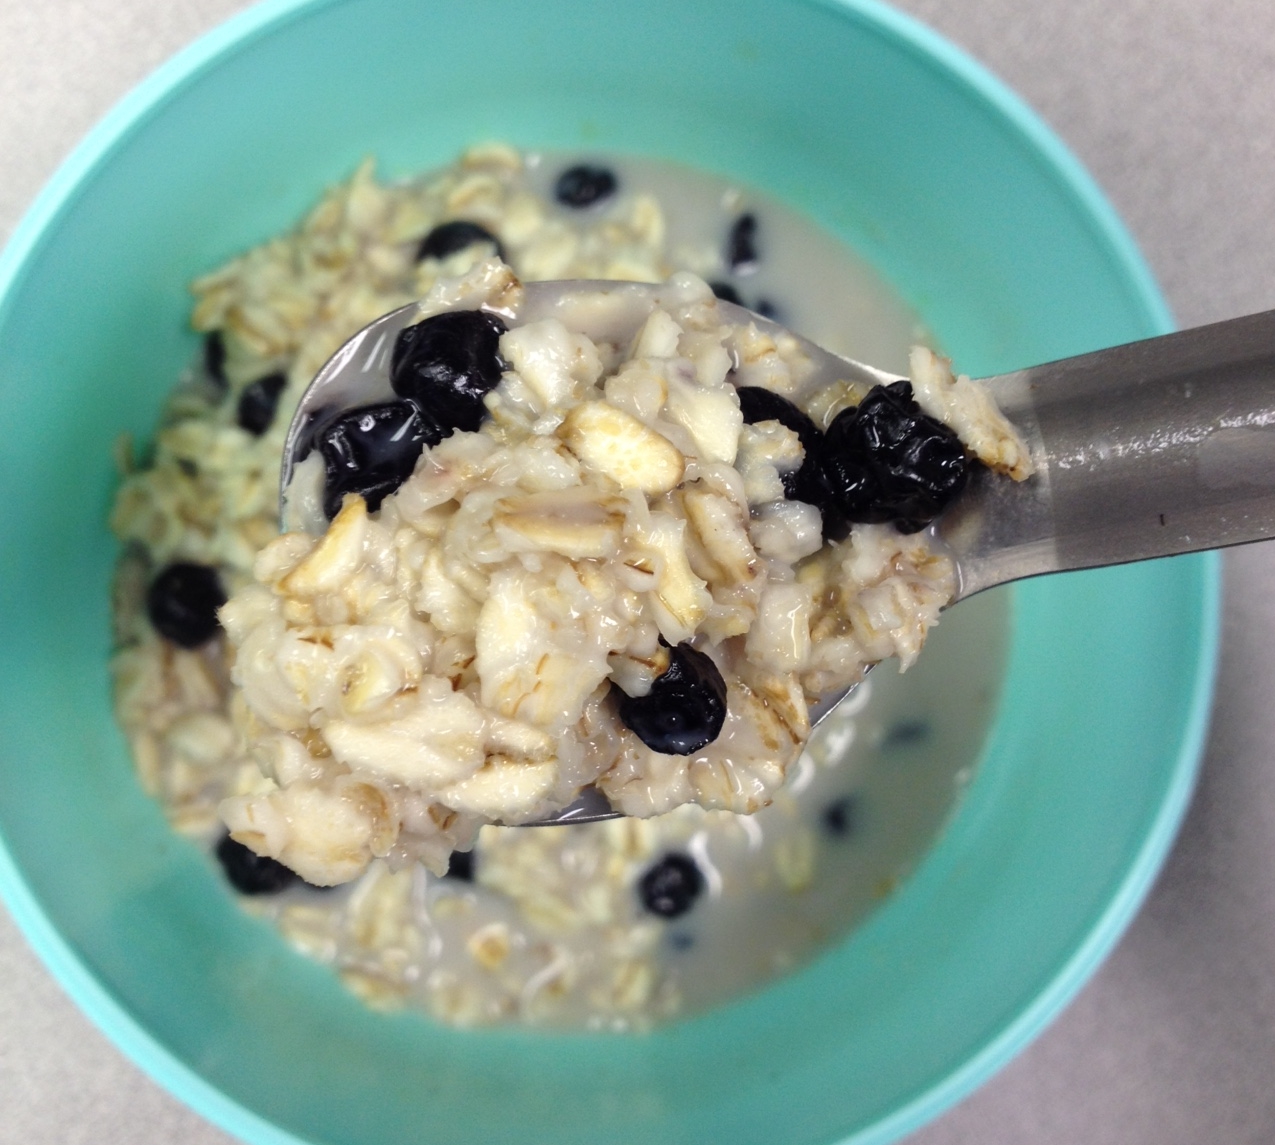
Backpacking Meals - Blueberries and Cream Oatmeal


Recipe Type: Scratch
Servings: 1
Calories: 400
Prep Time: Boil + 10 Mn
Water: 1 c Boiling
Complexity: Easy
Rating: 4.5/5
All In Cost: $1.14

At Home:
Cook in Bag: Combine the following ingredients into a 25 oz OpenTip hot food preparation bag.
Cook in Pot: Combine the following ingredients into a ZipLock bag.

AmntIngredients
1/2 cRolled Oats
2 TSugar
1 TNIDO Milk Powder Link
1/4 cKirkland Dried Whole Blueberries
pinchSalt
1 cBoiling Water

Also add the following items to the bag.
1 Pkg3-5 g Food Safe Desiccant packet Link

Print the following bag insert and include it in the bag for preparation instructions and other handy data. (Highlight everything within the dashed line, starting with the space above it and ending with the space directly below it. Then right click the highlighted area and select "Print".)

Blueberries and Cream Oatmeal

Recipe Type: Scratch
Servings: 1
Calories: 400
Prep Time: Boil + 10 Mn
Water: 1 c Boiling
Complexity: Easy
Rating: 4.5/5
All In Cost: $1.14


Cook In Food Bag Directions: Remove desiccant from the food bag. Add 1 cup of boiling water to food bag. Mix well. Seal food bag and place in bag cozy for 10 minutes. Mix well. Serve.


Cook In Pot Directions: Remove desiccant from the food bag. Boil 1 cup of water in pot. Add food bag contents to the pot. Stir well. Let stand covered for 5-10 minutes in a pot cozy. Mix well. Serve.


TTFN
B

Wednesday, August 16, 2017

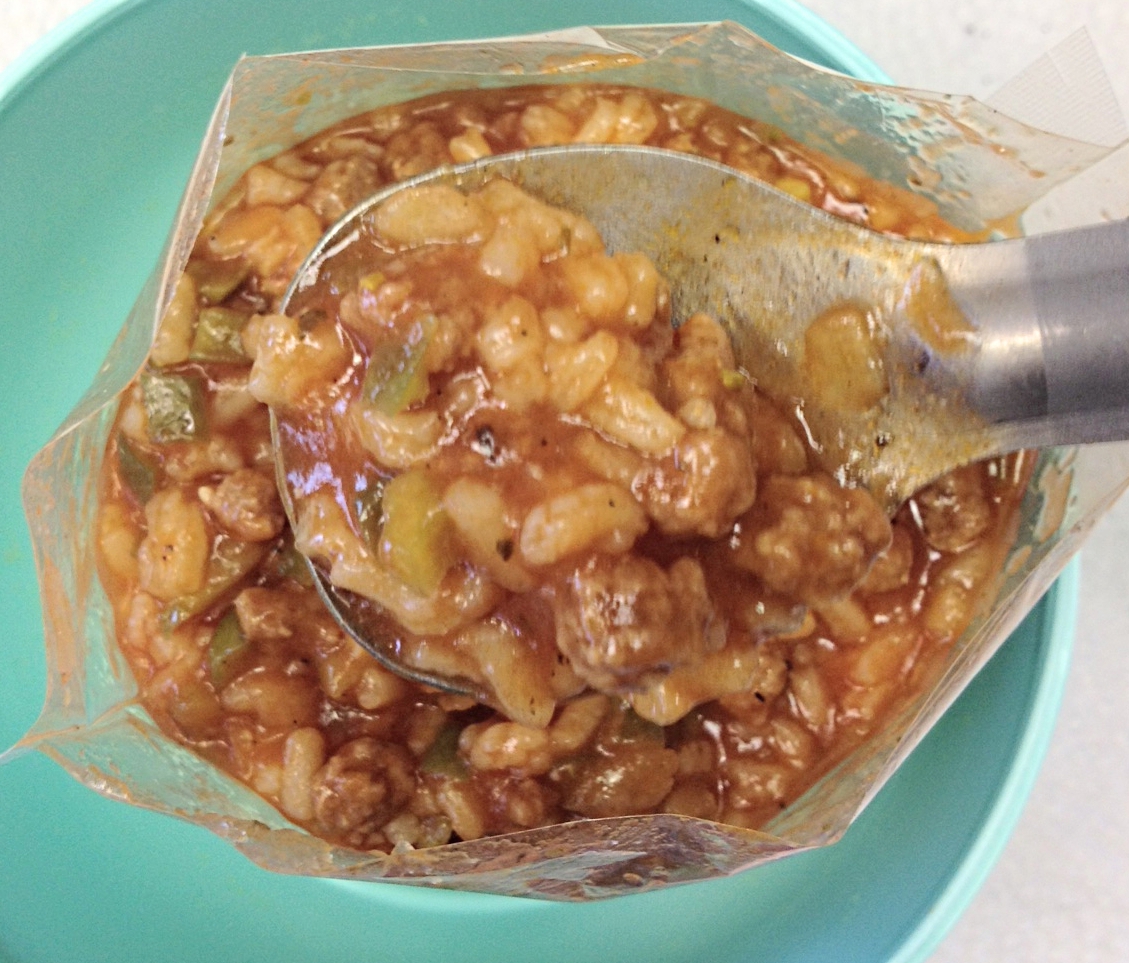
Backpacking Meals - Unstuffed Peppers


Recipe Type: Scratch
Servings: 1
Calories: 586
Prep Time: Boil + 15 Min
Water: 2 c Boiling
Complexity: Easy
Rating: 5/5
All In Cost: $4.06

At Home:
Cook in Bag: Combine the following ingredients into a 25 oz OpenTip hot food preparation bag.
Cook in Pot: Combine the following ingredients into a ZipLock bag.

Amnt
Ingredients
1/2 c Freeze Dried Ground Beef Link
1/4 c Freeze Dried Bell Peppers Link
1/2 c Instant Rice
4 t Tomato Powder Link
1 T Freeze Dried Onion Link
1 t Sugar
1/2 t Salt
1/4 t Freeze Dried Garlic Link
dash Basil
dash Oregano
dash Pepper

Also add the following items to the bag.
1 Pkg1.2 g  Savory Choice Beef Broth Stick  Link
1 Pkg6.5 g Thick and Easy Packet (Honey Consistency)  Link
1 Pkg9 g CF Sauer Canola & Olive Oil Packet  Link
1 Pkg3-5 g Food Safe Desiccant packet Link

Print the following bag insert and include it in the bag for preparation instructions and other handy data. (Highlight everything within the dashed line, starting with the space above it and ending with the space directly below it. Then right click the highlighted area and select "Print".)

Unstuffed Peppers
Recipe Type: Scratch
Servings: 1
Calories: 586
Prep Time: Boil + 15 Mn
Water: 2 c Boiling
Complexity: Easy
Rating: 5/5
All In Cost: $4.06


Cook In Food Bag Directions: Remove desiccant, broth stick, Thick & Easy and oil packet from the food bag. Add contents of broth stick and oil to the food bag. Add 2 cups of boiling water to food bag. Mix well. Seal food bag and place in bag cozy for 10 minutes. Add Thick & Easy to food bag. Mix well. Place food bag in bag cozy for 5 minutes. Stir well. Serve.


Cook In Pot Directions: Remove desiccant, broth stick, Thick & Easy and oil packet from the food bag. Add 2 cups of water to the cook pot. Add contents of food bag to pot. Add contents of broth stick and oil to pot. Mix Well. Bring to a boil and then simmer for 2-3 minutes. Stir often. Let stand covered for 5-10 minutes in a pot cozy. Add Thick & Easy to pot. Mix well. Let stand 5 minutes. Serve.

TTFN
B

Monday, August 14, 2017

Backpacking Meals - Bear Creek Chile Add On Recipe


Recipe Type: Add On
Servings: 1
Calories: 673
Prep Time: Boil + 20 Mn
Water: 2 c Boiling
Complexity: Easy
Rating: 5/5
All In Cost: $4.94

At Home:
Cook in Bag: Combine the following ingredients into a 25 oz OpenTip hot food preparation bag.
Cook in Pot: Combine the following ingredients into a ZipLock bag.

Amnt Ingredients
1/4 Pkg Bear Creek Chile Link
1/4 c Freeze Dried Sausage or Ground Beef Link or Link
1/4 c Freeze Dried Red Beans Link or Link
4 t Tomato Powder Link
1 T Dehydrated Tomato Link
2 t Chile Powder
1 t Cumin
1/2 t Salt
Dash Pepper

Also add the following items to the bag.
1 Pkg 1.2 g  Savory Choice Beef Broth Stick  Link
1 Pkg 7 g Texas Pete Packet  Link
1 Pkg 6.5 g Thick and Easy Packet (Honey Consistency)  Link
1 Pkg 9 g CF Sauer Canola & Olive Oil Packet  Link
1 Pkg 3-5 g Food Safe Desiccant packet Link

Print the following bag insert and include it in the bag for preparation instructions and other handy data. (Highlight everything within the dashed line, starting with the space above it and ending with the space directly below it. Then right click the highlighted area and select "Print".)

Bear Creek Chile

Recipe Type: Add On
Servings: 1

Calories: 673
Prep Time: Boil + 20 Mn

Water: 2 c Boiling
Complexity: Easy

Rating: 5/5
All In Cost: $4.94


Cook In Food Bag Directions: Remove desiccant, broth stick, Texas Pete, Thick & Easy and oil packet from the food bag. Add contents of broth stick, oil and Texas Pete packages to food bag. Add 2 cups of boiling water to food bag. Mix well. Seal food bag and place in bag cozy for 15 minutes. Add Thick & Easy to food bag. Mix well. Place food bag in bag cozy for 5 minutes. Stir well. Serve.

Cook In Pot Directions: Remove desiccant, broth stick, Texas Pete, Thick & Easy and oil packet from the food bag. Add 2 cups water to the cook pot. Add contents of the food bag to pot. Add contents of broth stick, oil and Texas Pete packages to pot. Mix well. Bring to a boil and simmer 2-3 minutes. Stir often. Let stand covered in a pot cozy for 10 minutes. Add Thick & Easy to pot. Mix well. Let stand 5 minutes. Stir and serve.


TTFN
B

Backpacking Meals - Development Approach


My goal is to create lightweight, great tasting, easy to prepare food that is much less costly than buying the same type of food from a specialty manufacturer. I use multiple approaches when developing a recipe. In some cases I will start with an inexpensive off the shelf product to get me close to the end result and in other cases I'll do everything from "scratch". This approach allows for a great deal of flexibility and the results can be surprisingly good. 

My go to off the shelf products are mainly Bear Creek Country Kitchens, Knorr Rice and Pasta sides and instant pudding items. You are certainly not limited to these products. Anything is fair game. I also use instant rice products and single serve meat products like tuna fish and spam. 
Note: Any product with pasta larger than a grain of rice will need to be separated from the other ingredients and cooked along with the boiling water for it to be cooked properly.
  • Bear Creek Country Kitchen food items generally contain 2-4 servings and range in price from $1.75 for a two serving envelope to $3.99 for a four serving envelope. I have found the four serving envelopes at the Christmas Tree Shop for $1.99 which is how I discovered these items in the first place. If you can't find them on sale at a store, I have found ordering them from Walmart.com is the cheapest avenue. Amazon.com has been very expensive when I have checked there.
  • Knorr Rice and Pasta Sides are usually used for a single serving camping meal. I can find these at local grocery stores and Dollar Tree for $.99 per envelope. I mainly stick with the rice sides because it is less hassle during the home preparation stage.
  • Instant pudding products make for great desserts. You can get a lot of mileage out of these items because of the number of flavors that are available. If a dry milk product is added to the pudding mix then cold water is the only ingredient needed to prepare the pudding when on the trail. Then all kinds of other items can be added for variety.
If I start with an off the shelf product, I will generally add more primary ingredients and sometimes I'll add more spices for a richer flavor. The Bear Creek "Darn Good" Chile for instance tastes pretty good out of the bag, but adding a few more beans, some freeze dried sausage or hamburger and some cumin makes it much better.

Getting the right consistency in the final result for a "just add water" meal can be tricky. When cooking in your kitchen, thickening gravies, soups and stews is pretty simple, but when you are on the trail it is quite a different story. The hottest the meal will usually get is when the boiling water is added to the dry ingredients, but many thickening techniques require some amount of continuous heating which you probably won't have on the trail if you are minding strict weight allowances on fuel and your are trying to keep things simple. In addition, if the thickening agents are in the food from the beginning, they can interfere with the other dry ingredients ability to re-hydrate. Fortunately we can overcome these issues by adding the thickening agent at the end of the preparation process in the form of "Thick & Easy". Thick & Easy is the perfect thickening agent for just add water backpacking meals!


In general, calories, fat and sodium are not as much of a concern for these meals since the point of these particular meals is to refuel someone who is hiking, sweating and generally exerting themselves. If these issues are a concern, there is certainly a lot of latitude with the recipes and most people who are even mildly familiar with cooking should be able to adapt any recipe to their liking.

General portion and preparation goals are to aim for using two cups of boiling water and about 600 calories for a dinner and 1 cup of boiling water and 300 calories for a breakfast or dessert item. The calories can certainly vary, but I try to stick to the water requirements, so water and fuel planning is easier to do.

For pasta meals that don't come from an envelope to start, I use regular pasta products. I try to use types of pasta that require shorter boil times. For instance, I recommend using angel hair pasta rather than spaghetti, since it cooks faster. I have tried precooking pasta and then drying it, since I had read that it made pasta preparation faster, but I found this technique too much of a hassle and now I just keep the pasta separate inside the main meal bag, so I can put it in the boiling water pot to get a head start on cooking. Then I just dump it in the bag with the water when it is ready.

I always include a food safe desiccant pouch in the main bag just in case the meal doesn't get used immediately. These are pretty cheap if you shop around a little.


The meals do not have to be prepared inside the special bag, but it can be used if desired. I tend to use the bags because cleanup is easier. The contents can easily be prepared in a cooking pot if desired, but make sure you have an insulating cozy for the pot. Most meals will need to sit in an insulated cozy for 10-20 minutes regardless if the meal is prepared in a pot or the bag. 


There are instructions on youtube for making a pot or bag cozy. They are typically made from windshield sun shades. The picture above is a bag cozy I made.

TTFN
B
Sunday, August 13, 2017

Backpacking Meals - Boiling Water


All of the hot backpacking meals presented here require some amount of boiling water to cook and re-hydrate the food. I prefer to use an alcohol stove. Some folks prefer a canister stove. This is really a personal choice thing. Find what works for you. There are hundreds of Youtube videos and web pages that discuss boiling water for backpackers and campers. I thought I would discuss the process and equipment I use.

My favorite cook set is a mixture of items I made myself and includes a few off the shelf items as well. It is fairly light and small in size which are qualities that I desire in backpacking equipment. TheGoatMumbler has a good Youtube video on economical cook kits here.


The cook set includes a stove, stove insulator, pot, cup, windscreen, lighter and magnesium fire starter. I carry (separately) a long-handled titanium spoon as well that isn't pictured.


The alcohol stove includes a pot stand and burner and is made out of a fancy feast cat food can, aluminum roof flashing, fiberglass cloth and some rivets. The stove is one I made myself and is loosely based on the stove seen here. The windscreen (coiled up in the cup above), is made from aluminum roof flashing. It is significantly lighter than the windscreen I purchased from Amazon. The pot lid will also fit on the camp cup which is pretty handy.

The process of boiling water, using the equipment above, goes something like this:
  • Determine the amount of water needed and put it into your cook pot. If boiling water for a meal or drink, the package should indicate the amount needed. Using a lid will significantly reduce the boil time, so I recommend using one.
  • Given the amount of water you need to boil, determine the amount of fuel needed to boil the water and add it to your alcohol stove. My fuel of choice is HEET in the yellow bottle. This is definitely one of those things you should research, so you are comfortable with the notion. I did my research and I am fine with it, in fact, I recommend it! The amount of fuel needed to boil two cups of water ranges from .5 oz to 1.25 oz. Once you know what your setup requires, you can plan how much you need for a given trip.
  • Find a suitably stable and flat surface to place the alcohol stove. Be sure to put the ground insulator down first and place the stove on top of it. This insulator can serve multiple purposes, but the main purpose is to prevent the bottom of the stove coming in contact with surfaces that are too cold. I still use it in the summer to protect the ground where the stove will be burning.
  • Ignite the alcohol stove.
  • Place the pot with the water on the pot stand. Be sure it is centered to limit the chance of the pot tipping over.
  • Place the windscreen around the pot and stove to protect it from moving air.
  • Within 6 to 10 minutes, 2 cups of water can be boiled using this method. There are many variables that will impact this time. The main factors will likely be the water's starting temperature and the ambient air temperature.


If you would like to see this process in action, here are a few links you can check out:
  • Shug demonstrating the use of his "Fancee Feest" Alcohol Stove: Link
  • Hiram Cook demonstrating the use of his Fancy Feast Alcohol Stove: Link
If you are interested in learning more about making alcohol stoves there are literally hundreds of Youtube videos on the subject. Check them out for yourself.

If you prefer to buy your equipment, the links below may be of interest to you.
  • Canister stove and fuel
    • Canister fuel: Amazon Canister 100 g fuel. The fuel canisters come in larger sizes, but the 100 gram size will fit inside the Stanley cook kit and many others as well.
    • Canister stove: BRS stove. Super small and highly recommended.
  • A-SZCXTOP Portable Alcohol Stove: Link. This works pretty good for a wide range of circumstances and cook kits. I recommend the stove specifically mentioned in the link above because of the pot stand. There are many burners that look like the one in the link, but they don't all come with a stand and if they do come with a stand, they are not all as flexible as the stand in the link.


TTFN
B

Friday, August 11, 2017

Backpacking Meals - Specialty Materials


This post will focus on the specialty materials used to prepare different meals at home for remote backpacking trips where weight matters and simplicity is required. Simplicity and low weight do not mean you are limited on your menu if you are willing to experiment a little. I also do not want to poison myself by using the wrong container to prepare meals, so a little research is in order as well. Most meals are contained in one or more plastic bags. Everything to prepare the meal is in the bag except the water which is where the majority of food weight comes from.

The first material item is the food itself. I used freeze dried and dehydrated food items. Freeze dried and dehydrated foods can be purchased from several manufacturers and most of them are available through Amazon.com. I have tried the places below and recommend them.


The next material item is the container in which the meals are stored and many times are also prepared within. Special plastic bags designed to have boiling water poured in them or bags that are designed to be placed in boiling water are used for these meals. ZipLoc brand freezer bags are not designed for either of these purposes. The plastic in ZipLoc freezer bags softens under these conditions and can melt which can release toxic stuff we should not ingest. I do use these types of bags to keep items separated withing the main bag on occasion though. The bags listed below are the types I recommend.

  • opentip.com: http://m.opentip.com/product_info.php?products_id=8412154 These bags are used for pouring boiling water in to. I use the 16 oz, 25 oz and 34 oz sizes. The 25 oz size seems to be the right size for a one person meal without any extras. The other two sizes are handy in other circumstances.
  • Weston 30-0206-W Vacuum Zipper Seal Bags (50 Count), 6" x 10": Amazon Link. These bags are used for immersing in boiling water to cook the contents in the bag. These are made to be used with a vacuum sealer and are primarily used to cook eggs.

Travel sized condiments and food preparation items can greatly enhance the flavor of meals and still maintain a level of simplicity. Many of these items can be found at fast food restaurants, food bars and convenience stores. For specialty items in this class I recommend the places listed below.

TTFN
B

Disclaimer: Do your own research and find what works for you. I have done that for myself and I feel comfortable with the items I use. The information above should help get you started.

Wednesday, August 9, 2017

New Series - Backpacking Meals


It has been several years since I have posted anything on this blog. I tend to focus on certain food related areas like bread, pizza, canning, etc. At the moment I am focusing on creating just-add-water meals for backpacking. I have learned a lot about this topic over the last few month and thought I would share my learning and my recipes on this blog. It seems appropriate.

I'll start off with a few entries on technique and materials and then get into some suggestions on how to "cook" the food and then I'll post recipes as I develop and test them.

TTFN
B