Showing posts with label Technique. Show all posts

Monday, May 30, 2011

Greek Yogurt With Macerated Blueberries and Strawberries


  This simple and appropriately colored dish is a refreshing and somewhat healthy snack or dessert. By the way, happy Memorial Day to everyone and a great big Thank You to our veterans and soldiers both living and deceased!

Greek Yogurt With Macerated Blueberries and Strawberries
1/2 c Greek yogurt
3 tbsp sugar
1/4 c strawberries, sliced
1/4 c blueberries

  Macerate the berries by adding 2 of the tbsp of sugar to the berries, mix well and let sit for 20 minutes. Mix the remaining tbsp of sugar into the yogurt. Once the berries are nice and juicy, put half the berry mixture in the bottom of your bowl, cover with yogurt and put the remaining berry mixture on top. Enjoy! :-)

  A quick word about Greek yogurt. Unless you get the yogurt from Greece, it won't really be much different than regular yogurt except the majority of the whey will have been removed to get the thicker consistency associated with Greek style yogurt. With that said, if you take regular yogurt and drain the whey out by using a coffee filter and a colander, you will get a very similar result. Simply put a coffee filter in a colander and put the yogurt in the coffee filter. Put a bowl under the whole contraption to catch the whey. You can use the whey for other recipes if you like. The process takes a few hours and I typically do it overnight in the fridge. I have been using this technique for years for baked potato topping, sauces, dips and dressings. It really is a great substitute for sour cream.

TTFN
B

Tuesday, May 24, 2011

Mild Italian Link Sausage

 
  Who doesn't like sausage? The only thing I dislike about store bought sausage is most of it contains MSG (or natural salt if you want to be evasive). An allergy to MSG prevents some of our family from partaking in MSG laden foods, so we have to take matters in to our own hands when it comes to things like sausage. Preparing this sausage is a little extra work, but very satisfying in the end. I recommend doing as much sausage making as you can while all the sausage making gear is out. It isn't hard and maybe this entry will push you over the edge to try it yourself.

Mild Italian Link Sausage
2 lbs pork butt (with fat)
2 tsp kosher salt (or sea salt)
1 1/2 tsp black pepper, ground
1/2 tsp garlic powder
1 tbsp dried parsley
1 1/2 tsp fennel seed, ground
5 ft natural casing

For Hot Sausage Add:
2 1/2 tsp paprika, ground
1/4 tsp anise seed, ground
2 tsp red pepper flakes

  Mix all seasoning ingredients together. Cut the pork into chunks. Mix the pork and seasonings together. Grind the pork mixture with your choice of meat grinding hardware.

  Our choice of sausage stuffing and grinding hardware was the sausage attachments for our KitchenAid mixer. We used the fine die on the mixer for grinding, but recommend using the course or large die. The next time we do this we will definitely use the larger die for grinding. Once the pork is ground, refrigerate the mixture for at least an hour while preparing the casings. The mixture should be cold while stuffing the sausage.

  We used natural casings obtained from a local kitchen store. The package is fairly small and could easily be ordered from the internet if you cannot find it locally. You may want to consider using collagen casings instead of the natural casings if that is more to your liking. There is a lot of information on the internet about the different kinds of sausage casings and plenty of places to order them from. Any leftover casings can easily be stored either in your pantry or refrigerator depending on the type you choose. To prepare our casings we had to soak them in warm water and rinse them thoroughly.

  When the ground pork mixture was chilled for an hour, I tied one end of a prepared casing into a knot and slid the other end on to the sausage making tip all the way up to the knotted end. I turned on the mixer and started stuffing the ground pork mixture into the hopper which feeds an auger which eventually pushes the pork in to the casing. Continue until the casing is completely full or you run out of meat.

This particular batch was grilled with sweet onions and peppers and served on a soft italian roll.
A few things we learned along the way:
- Any left over natural casings can be stored in your refrigerator, sealed in the original bag completely covered in salt for up to a year.
- To clean out the auger after making the sausage, send a few pieces of bread through the system to push out any left over meat. This greatly simplified the cleanup.

Enjoy!

TTFN
B

Sunday, May 8, 2011

Grilled Margherita Pizza


You haven't tasted pizza until you've tasted a real Margherita pizza. Wow ....

".... the classic story of the pizza Margherita. Modern pizza history was made in 1889 when Queen Margherita Teresa Giovanni, the consort of Umberto I, visited Naples with her king. Don Raffaele Esposito, who owned Pietro Il Pizzaiolo, was asked to prepare a special dish in honour of the Queen's visit. Esposito consulted his wife who was the real pizza expert and together they developed a pizza featuring tomatoes, mozzarella cheese, and basil. He named it the Margherita Pizza, after the city's guest of honor. " (recipepizza.com)

  Today, the cassic Margherita pizza is a simple pizza dough covered with crushed tomatoes, a sprinkle of sea salt, pinched pieces of fresh mozzarella cheese, fresh basil leaves, a sprinkle of grated parmesan cheese and a drizzle of olive oil. Traditionally the pizza is then baked in a wood fired oven at around 700 degrees F for about 90 seconds. Most of us can't touch those temperatures unless we have our own wood fired ovens, but I can get close enough with my outdoor grill to enjoy this classic pizza.
 
Grilled Margherita Pizza
21 oz pizza dough ball (store bought or homemade)
3-4 oz crushed tomatoes
8 oz fresh mozzerella
6-10 fresh basil leaves
generous pinch of sea salt
small handful grated parmesan cheese

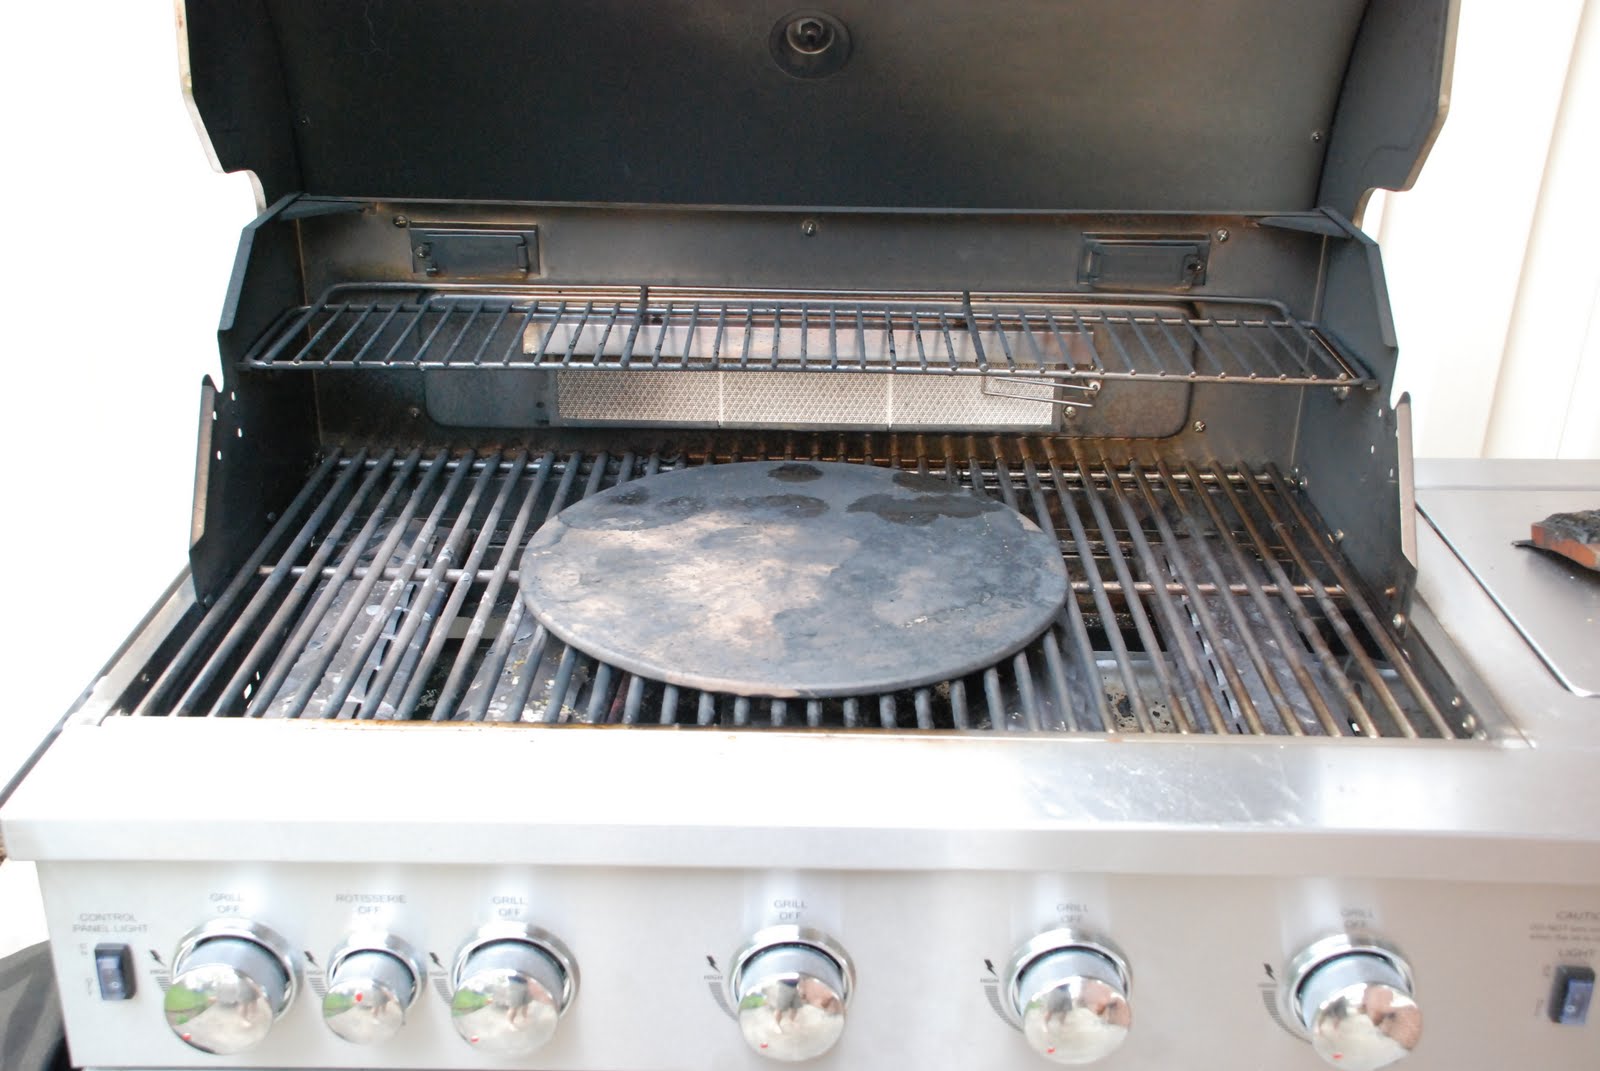
  I heat my grill up with the 16 inch stone in the center (lid closed). I set the burner dials at about half. After 10 minutes the thermometer in the lid of my grill measures about 400 degrees F. I don't have an infrared thermometer, but I am pretty sure the stone is at least 600 degrees F.

 Recently I have discovered the pizza screen. While the grill is heating up, I build the pizza right on the screen. (I discuss the technique for stretching the dough here.)

  The screen goes right on the stone for 2 minutes. After 2 minutes, I slide the peel in between the screen and the pizza so I can remove the screen and put the pizza directly on the stone. I also turn on the sear burner at the back of my grill and rotate the pizza over the next 2 minutes making sure all the edges have been cooked properly. With a little practice I have been able to get a good char on the bottom of the finished pizza.

  The whole cooking process takes about 4 minutes. You may want to use a timer because it doesn't take long to turn the pizza into a cinder at these temperatures. If you like NY style pizza, I guarantee you will love this pizza.

TTFN
B

Pizzeria Pizza Dough


  Many years ago I made my own pizza dough at home. I was trying to re-create the dough we used at the pizza shop I worked at as a student, but I never really found what I was looking for and consequently when I discovered I could buy pizza dough balls at the grocery store I had to try them. It turns out they were pretty good and a whole lot less trouble too. But, I can't really take the complete home pizza journey unless I make my own dough. So, after all these years I finally found what I was looking for and I got a little help from an unexpected source. I knew what ingredients I wanted to use and I knew some of the relative amounts, but we used to make 45 doughs at a time at the pizza shop and scaling that down to 1 pizza dough was the real challenge I was facing. Thats where the unexpected help comes in: introducing ..... the Lehmann Pizza Dough Calculator (insert angelic voices here). This tool allowed me to quantify and tweak those ingredients and ratios until I finally found the dough of my dreams. :-)

  Now, having said all that, I am fairly old school when it comes to cooking and baking. I learned to cook using volumetric ratios (ya know, measuring cups and the like), but when it comes to dough, I think a scale is the only way to go (at least for the flour and water). If you want that extra measure of success, you really need to use a scale when it comes to bread and pizza dough.

Pizzeria Pizza Dough
12.82 oz ap flour (100%) (approximately 2 3/4 c)
7.82 oz water (61%)
.03 oz/ 1/4 tsp instant dry yeast (.21%)
.17 oz/ 1 tsp sea salt (1.32%)
.28 oz/ 2 tsp sugar (2.19%)

  I throw all these ingredients into my Kitchenaid mixer and combine with a dough hook for about 5 minutes. I then dump it on to my floured counter top and let it rest for 5 minutes. You should end up with a dough ball around 1.3 lbs that is soft and slightly tacky. This is adequate for a 16 or 18 inch pizza. For a 14 inch pizza you may want to try 1 lb dough balls. You could triple this recipe and cut the resulting mass into 4 pieces or you could use the Lehmann Pizza Dough Calculator (LPDC) to back calculate a 1 lb dough ball from the ratios listed above. Below is a shot of the LPDC in action:


  Ok, so you have a hunk of dough ... now what. This next piece is fairly important if you want to make a round pizza without any holes in it when you stretch it. Hold the dough with both hands and curl your fingers in toward the center of the dough ball while stretching the other side of the dough ball with your palms. Turn the dough a quarter turn and do the same curling motion again. Do this 3 or 4 times. If done correctly you should have a dough ball that is nice and smooth and tight on one side and messy and ragged with a hole in the middle on the other side. Pinch and twist all the ragged parts together in the center closing the hole. This ragged side will be the bottom of your dough ball. Place the dough ball (bottom side down) in a lightly oiled bowl and cover with saran wrap for a few hours to proof at room temperature. You can tell when the dough is done proofing because the dough will have relaxed significantly and it will have a bit of a sheen to it (see pics below). If you want to freeze the dough, stick it in a lightly oiled quart freezer bag to proof for a few hours and then stick it in the freezer in such a way as to preserve the shape of the ball until it is frozen.

Before proofing. Dough is semi-tight with no sheen.
After proofing. Dough has relaxed and has a bit of a sheen to it.

  I am not a big fan of the 'faster is better' philosophy, but sometimes you need to get things done a little quicker than normal. I have proofed this dough in as little as 45 minutes and had good results. For the fast proof method, use warm water when you make the dough and proof the dough in your oven that has been pre-heated to 100 degrees F (turn the oven off after pre-heating). Place the saran covered bowl (and dough) in the oven for 45-60 minutes.

  If you need a little help on stretching the dough to make a round pizza, I discuss this technique here.
 Enjoy!

TTFN
B

Thursday, August 19, 2010

Fire Roasted Red Peppers


Roasted red peppers are another handy preparation to have around. We harvested these from the bucket garden and Mommasan had the great idea of roasting them, so on the grill they went. We hadn't done this before, so we have some wisdom to pass on. Cutting in half and coring was the only prep work we did. Getting the roasting part right is the tricky part. You want the peppers to lay as flat as possible with the skin side toward the heating surface. You can do these under your oven's broiler as well. The trick is getting every part of the skin blistered. If it isn't blistered everywhere then it will be tough to get all the skin off. The skin comes off very easily if it is blistered properly. If you are having a tough time getting the skins off put'em back on the grill. We had more than we could immediately use so I canned the remainder into half-pint jars for later.

TTFN
B

Saturday, August 14, 2010

Sourdough Bread


  I have embarked upon another journey, only, this one has me a little more excited than pasta and canning. I feel like Tom Hanks' character on the beach in Cast Away when he has his arms extended to the heavens shouting, "I HAVE MADE FIRE." Only, I would shout, "I HAVE MADE BREAD." Bread you say? Anyone can make bread .... Well, as it turns out this last statement is true, but there is a little twist ... you are only allowed to use three ingredients; flour, water and salt. No store bought yeast, no oil or butter, no fancy dough conditioners or vital gluten, no store bought pre-mixed dough in a bag ... just flour, water and salt. What do you say now ...?
  If you are not already familiar with this process then you will be amazed at how easy it is to do, how nice it looks out of the oven and how supremely awesome it tastes. This was made with only three ingredients, some time to prepare and read about the process and some common kitchen items. I am not going to describe the step by step detailed process to you or shoot a video because many people before me have already done this and they are much better at it than I am. I will give you a road map though and provide you with my lessons learned. I started this journey about a week and a half ago and had some failures in the beginning, but now I know what to do and maybe I can save you a little time if you care to try this. First of all this is what my first success looked like out of the oven this morning:


I think it looks pretty sexy. :-)  Anyone can do this. It might even be fun to do with kids because it is that easy. First, learn about sourdough starters and how to make them by visiting this link. Sourdough Baking by John Ross will explain most of what you need to know about making a sourdough starter and he will even give you a recipe for making the bread, but I suggest you read on and follow a different bread recipe which will unfold as we go. Don't add commercial yeast either. If you follow John's direction (minus the commercial yeast) it will work. I will mention a few things here while we are on the subject of sourdough starters. If you have city water, don't use the water straight out of the tap for the dough or the starter. It may kill your local wild yeasts that have setup camp in your sourdough starter container. This was the cause of all of my failures. As soon as I stopped using my city water out of the tap, things started coming together. Hopefully I can help someone avoid this frustration because it almost stopped me from continuing. Feel free to use well water from the tap or city water from a Brita filter or I read you can leave a container of city water out on your counter for 8 to 10 hours and the chlorine will go away.

Next, watch the video below. It will explain a technique that somehow attracted a cult following. Very similar techniques are used in other place around the world, but somehow in all our wisdom and gadgetry we lost this process and Mark Bittman and Jim Leahy are here to remind us.


Ok, the important parts to take away from the first video is the container Jim Leahy used to bake the bread and how simple his technique is. The next video will tie this technique together with sourdough baking and provide an easy to use and remember recipe for the bread. I want to warn you, the video is a little freaky, but it has all the info you need to get where we are going.


That's it! It couldn't be any easier. Here is the bread recipe if you missed it:

No Knead Sourdough Bread (1,2,3 method or 1,1,2,3 method for you detailists)
1 c sourdough starter
1 c warm water
2 tsp salt
3 c flour

There may be some differences due to oven type, choice of baking vessel or sourdough starter characteristics, but this is the general process which can be tweaked for your set of variables. Mix the ingredients together in a bowl. This step shouldn't take more than a minute. Cover the bowl with plastic wrap or equivalent covering. Let the dough rise for 6 to 12 hours. Many factors contribute to this time. Ambient temperature, water temperature, sourdough starter yeast population .. etc. When the dough has doubled, put your baking vessel in the oven and turn the oven temperature to 500 degrees Fahrenheit. When the oven is at the set temperature, carefully (so you don't deflate it) dump the dough on to a floured surface. Fold all four sides toward the center of the dough. Sprinkle corn meal in your baking vessel or all over the outside of your dough. Put the dough in the baking vessel and cover for 25 minutes. Remove the lid from the baking vessel and bake for 10 minutes more.

A few things I noticed ...
I used a $10 Granite Ware Roaster to make the loaf this morning. I also purchased an unglazed clay vessel from Romertopf for the same purpose. I noticed they definitely have different baking characteristics and I am guessing it has to do with the thickness of the vessel material. My loaves darken much quicker on the thinner Granite Ware roaster than with the Romertopf. I am guessing the you could also use the glazed ceramic insert from a CrockPot. For the crock lid just used some tin foil because most CrockPot lids have some sort of plastic handle that won't survive the high oven temperatures. It is important that the vessel have a lid, preferably the vessel should be bigger than your loaf so you can get it out and use some sort of edible grit on the bottom of the vessel to keep the dough from sticking. You can use corn meal, multi-grain cereal like Uncle Bob's, wheat bran or anything like those things already mentioned. Also, the instructions for the sourdough starter tell you to throw half of it away when you feed it. It also instructs to add 1/2 c water and 1/2 c of flour. You don't have to throw it out. You can use it to make all kinds of things like pancakes or biscuits. If you know you are making several loaves then add more than 1/2 c of water and flour. Just make sure there is enough starter left to continue the colony.

My intent here was not to re-invent sourdough bread. People have been making this bread for thousands of years. It doesn't need to be re-invented, but somehow it seems out of reach for most people which seems completely wrong. Maybe it just needs to be re-introduced. Something that was a common everyday process has been replaced with a loaf of Wonder bread form the grocery store. I feel sorrow for those people who will never experience what I felt and tasted this morning. Experiment with it. Try making rye, whole wheat, multi-grain, pumpernickle, ciabatta, english muffins, buscuits, sweet breads ...... the list is endless, but use the process explained above to do it. 

If you give this a try, you won't be sorry and maybe we'll get a chance to break bread together sometime. :-)

TTFN
B

Sunday, May 23, 2010

Pizza Night


One of the many skills I acquired in college was pizza making. I worked at a pizza shop for a short time and learned all I could about making the dough, sauce and pizza itself. This skill has served me well over the years and I have hosted many pizza parties and have gotten several compliments as well. I haven't made pizza in quite a while because of time constraints, but I noticed my local grocery store carries pre-made pizza dough balls in the refrigerated section and they are pretty good. Good enough to forgo the trouble of making my own pizza dough and easy enough to make pizza more often.

There are certain techniques and equipment you need to make real pizzeria style pizza at home. As far as equipment is concerned you will need a baking stone, a wooden pizza peel and an oven that can bake at 550F or higher. The restaurant I worked at kept their oven at 575F to 600F. I will discuss the techniques below as needed.

Pizza Sauce
6 oz can tomato paste
2 1/2 cans of water
1 tsp dried oregano
1 tsp dried parsley
1 tbsp salt
1 tsp pepper
1 tsp garlic powder
1 tsp sugar

Mix it all very well and put it in the fridge for a day before using it.

Cheese Pizza
pizza sauce (recipe above)
pizza dough (store bought or homemade)
corn meal (for the peel)
flour (for preparation)
mozzarella cheese

  Before making any pizza, put your pizza stone in the oven with only one rack located in the center at 550 degrees Farenheit. If your oven will go higher use any higher value up to 600 degrees farenheit. I usually do this first and then start preparing everything to actually make the pizza. Don't start making the pizza until your oven has reached the temperature you want to cook the pizza at because the stone needs to heat with the oven. This may take 30 minutes.
Spread corn meal on your peel.

  Stretch the dough to the size of your peel. This technique will take some time to master. Hopefully the pictures will help explain the process.

Start by flouring your working surface and both sides of the dough.

Press your fingers into the dough about one inch in from the edge all the way around.

With thumbs together, place the fingers of both hands into the indentation in the dough.

Spread your hands apart, turn the dough about 90 degrees ...

... repeat the process ...

... several times ...

... until the dough is spread out enough to drape over both fists.

Continue the same circular spreading motion with your fists ...

... as you did with your fingers above ...

... until the diameter of the dough is the size of your peel.


Lay the dough on the peel.

Spread your sauce on the dough. Do not press hard or your dough may stick to the peel.

Spread your cheese.

Place the peel near the back of the pizza stone and with tiny jerking motions slide the peel out from under the pizza leaving it centered as best you can on the stone. If the dough sticks to the peel at this stage you will have a gigantic mess ... take my word for it and don't let your dough stick to the wood! the corn meal should act like tiny ball bearings and the pizza should roll right off of the peel. The pizza will take about 6 minutes at 550 and 5 minutes at 600. At the 3 minute mark you can spin the pizza 180 degrees if your oven does not cook evenly.


Finished product.

White Pizza With Asparagus
alfredo sauce (Recipe)
pizza dough (store bought or homemade)
corn meal (for the peel)
handful of asparagus
flour (for preparation)
mozzarella cheese

I use a microwave as often as I can to cut down on prep time. Steaming vegetables is definitely one of those time saving activities.
I put my asparagus on a plate with a little water, cover with plastic wrap and microwave for 2 minutes. Dry the asparagus off and cut into thirds.

Follow the dough process from above.

Spread your sauce.

Spread your cheese and toppings

Slide the pizza off the peel.

Finished product.

If you decide to try pizza making, I would love to hear back from you.

TTFN

B.

Asparagus Ravioli with Alfredo Sauce

  Wow, it has been many more months than I intended to write my first real entry. I actually have a few other entries started, but time seemed to slip away and now here I am  five months later. I guess the thing pushing me over the edge now is the number of people I have promised to give this recipe to and haven't gotten to that either. I suppose if I am going to write it down it might as well be here.
  We were exposed to this dish in Strasbourg France last Christmas and I immediately added it to my "gotta re-create this dish" list since my girlfriend liked it so much. I have never seen this type of ravioli in a food store, so I figured I am going to have to learn to make my own pasta. Like most people who have never made their own pasta I was intimidated by the idea and thought it would be too much trouble. In fact I thought about making my own pasta for probably 15 years before I actually tried it in January of this year. Let me help you out a little ... don't wait! It is way too much fun to miss out on it any longer.
  I do have a few pointers for you if you don't have any pasta making devices currently and are thinking of trying homemade pasta. If you have a KitchenAid stand mixer that accepts the pasta attachments, definitely go that route. The sheet, spaghetti and linguine attachments are a must. I also opted for the ravioli maker, but if I had to do it all over again I would forgo the $150 expense. I think the process I use in this entry is plenty good enough. I also recommend getting 'The Pasta Bible'. I haven't gotten my copy yet, but it has recently shot to the top of my book buying list. For anyone who intends to make homemade pasta part of their life, it will be an invaluable asset.
  This is somewhat of an original recipe. I could not find an exact recipe on the internet so I researched the components and put together what seemed right to me. The ravioli filling is a cheese filling adapted for this recipe, the sauce was a mixture of several different Alfredo sauce recipe's with the yummiest components being reserved for my own version and of course the pasta recipe is a standard recipe from the book that came with my pasta attachments. This recipe serves 4.

Ravioli Filling
1 bunch asparagus (about 2-3 inch diam)
1/2 tsp garlic powder
1 c ricotta cheese
1/4 c grated Parmesan cheese
2 large egg yolks
1 tsp salt
1 tsp pepper
1 pinch nutmeg

  1. Snap the asparagus toward the bottom of the stalk and discard the bottom. It is fairly common to throw away as much as 2 to 3 inches of the bottom depending on the how fat and how long the stalk is. We are trying to retain the most tender, non-woody parts of the asparagus. Remove 8-12 of the tips about 2 inches long and set aside for the sauce.

  2. Steam the remaining asparagus (not the tips) for 2-4 minutes or until al dente. Immediately put in an ice bath to stop any further cooking. Once cooled, remove the asparagus from the bath and remove as much water as you can in a towel or by other suitable means. This last part is important so your filling isn't runny.

  3. Chop the asparagus in a food processor. I chop mine so that the pieces are about the size of a peppercorn.

  4. Combine the asparagus and the remaining ingredients (not the tips) in a bowl. Mix well. Cover and store in the fridge until needed.

Pasta Sheets
4 c all purpose flour
4 eggs
1 tbsp water
1 pinch of salt

  1. I should point out the pasta recipe calls for 3.5 cups of flour, but when you use the well method for pasta dough it doesn't hurt to have extra on the board. If you are making the dough in a machine only use 3.5 cups of flour. I should also point out that I now prefer the well method, but it took a little practice to keep the egg from spilling out.

  2. The process is pretty simple. Put the flour on a counter top or large wooden surface and make a hole in the center where the eggs, water and salt will be whipped together like making scrambled eggs. Slowly start mixing in flour from the inside of the well until resulting mass can be worked by hand. Remove any unneeded flour and knead the dough until the right consistency. This last statement is hard to describe. If you do it enough you just know when it is ready. 'The Pasta Bible' can help with this a little.

  3. When the dough ball is ready, cut in two. Wrap each piece in plastic wrap and sit in the fridge for 30 minutes.

  4. Using a pasta sheet maker, roll the pasta sheets out according to the instructions for your device.

Assemble Ravioli

  • When making my pasta sheets I keep them to a manageable size, about 24 inches long. When I am ready to make the ravioli, I fold one of these sheets in half and cut the folded end off so I have 2 separate sheets that are the same size. One is for the top and one is for the bottom.

  • For a full sheet I aim for 2 ravioli in width and however many I can fit lengthwise. The sheet above is a 2x5 example. Scoop the filling on to the bottom sheet in the center of each ravioli. Egg wash (beaten egg with a little water) the edges and in between each scoop of filling. Lay the top sheet on and remove as much air as possible working from the center out before cutting and crimping. Be careful not to squeeze the filling out from the center.

  • I am using a cutting/crimping wheel to finish the ravioli here. Roll the cutter along the edges and in between each ravioli.

  • These can be cooked right away in unsalted boiling water for 4 minutes or frozen for several months. Even the frozen version will cook in 5 minutes right from the freezer.

Alfredo Sauce and Finishing the Dish
2 c light cream
1-2 cloves garlic, minced (I prefer using a garlic press)
8-12 asparagus tips (reserved from above)
2 tsp salt
1 tsp pepper
2 tbsp flour
1/4 c grated parmesan cheese (don't chince on this, get the real stuff!)
1 tbsp butter

Note: Because the sauce comes together so quickly you will want to put a pot of water on to cook the ravioli when you start the sauce.

  1. On medium low heat, melt the butter and add the garlic to the melted butter. Do not brown the butter or the garlic. If this happens the heat is to high. This step should only take a minute or two. If your kitchen smells of garlic then you are doing it right. :-)

  2. As soon as your water is boiling add your ravioli and stir often to ensure even cooking.

  3. Add the cream, salt, pepper and asparagus tips. Stir often.

  4. Mix a little water with the flour until smooth. Remove any lumps. This will be used to help thicken the sauce a bit.

  5. When the cream mixture starts to bubble, briskly stir in the flour/water mixture and grated cheese.

  6. You can turn the heat off once the mixture is smooth.

  7. The ravioli should be done and bobbing on top of the cooking water. With a slotted spoon, scoop out the ravioli and mix in with the sauce. Make sure most of the water is drained from the ravioli. Cover and let stand for a minute or two.

  8. Serve it immediately.
The journey I experienced on this dish was very satisfying. I hope anyone who tried this enjoys it as much as we do and I would certainly love to hear back from anyone who does. As always, this recipe is a guide, if something doesn't suite you or something is missing please adapt the recipe and let us know how it worked out for you. Someone else may get some use from your suggestion as well.


TTFN

B.