Showing posts with label Tomatoes. Show all posts

Sunday, May 8, 2011

Grilled Margherita Pizza


You haven't tasted pizza until you've tasted a real Margherita pizza. Wow ....

".... the classic story of the pizza Margherita. Modern pizza history was made in 1889 when Queen Margherita Teresa Giovanni, the consort of Umberto I, visited Naples with her king. Don Raffaele Esposito, who owned Pietro Il Pizzaiolo, was asked to prepare a special dish in honour of the Queen's visit. Esposito consulted his wife who was the real pizza expert and together they developed a pizza featuring tomatoes, mozzarella cheese, and basil. He named it the Margherita Pizza, after the city's guest of honor. " (recipepizza.com)

  Today, the cassic Margherita pizza is a simple pizza dough covered with crushed tomatoes, a sprinkle of sea salt, pinched pieces of fresh mozzarella cheese, fresh basil leaves, a sprinkle of grated parmesan cheese and a drizzle of olive oil. Traditionally the pizza is then baked in a wood fired oven at around 700 degrees F for about 90 seconds. Most of us can't touch those temperatures unless we have our own wood fired ovens, but I can get close enough with my outdoor grill to enjoy this classic pizza.
 
Grilled Margherita Pizza
21 oz pizza dough ball (store bought or homemade)
3-4 oz crushed tomatoes
8 oz fresh mozzerella
6-10 fresh basil leaves
generous pinch of sea salt
small handful grated parmesan cheese

  I heat my grill up with the 16 inch stone in the center (lid closed). I set the burner dials at about half. After 10 minutes the thermometer in the lid of my grill measures about 400 degrees F. I don't have an infrared thermometer, but I am pretty sure the stone is at least 600 degrees F.
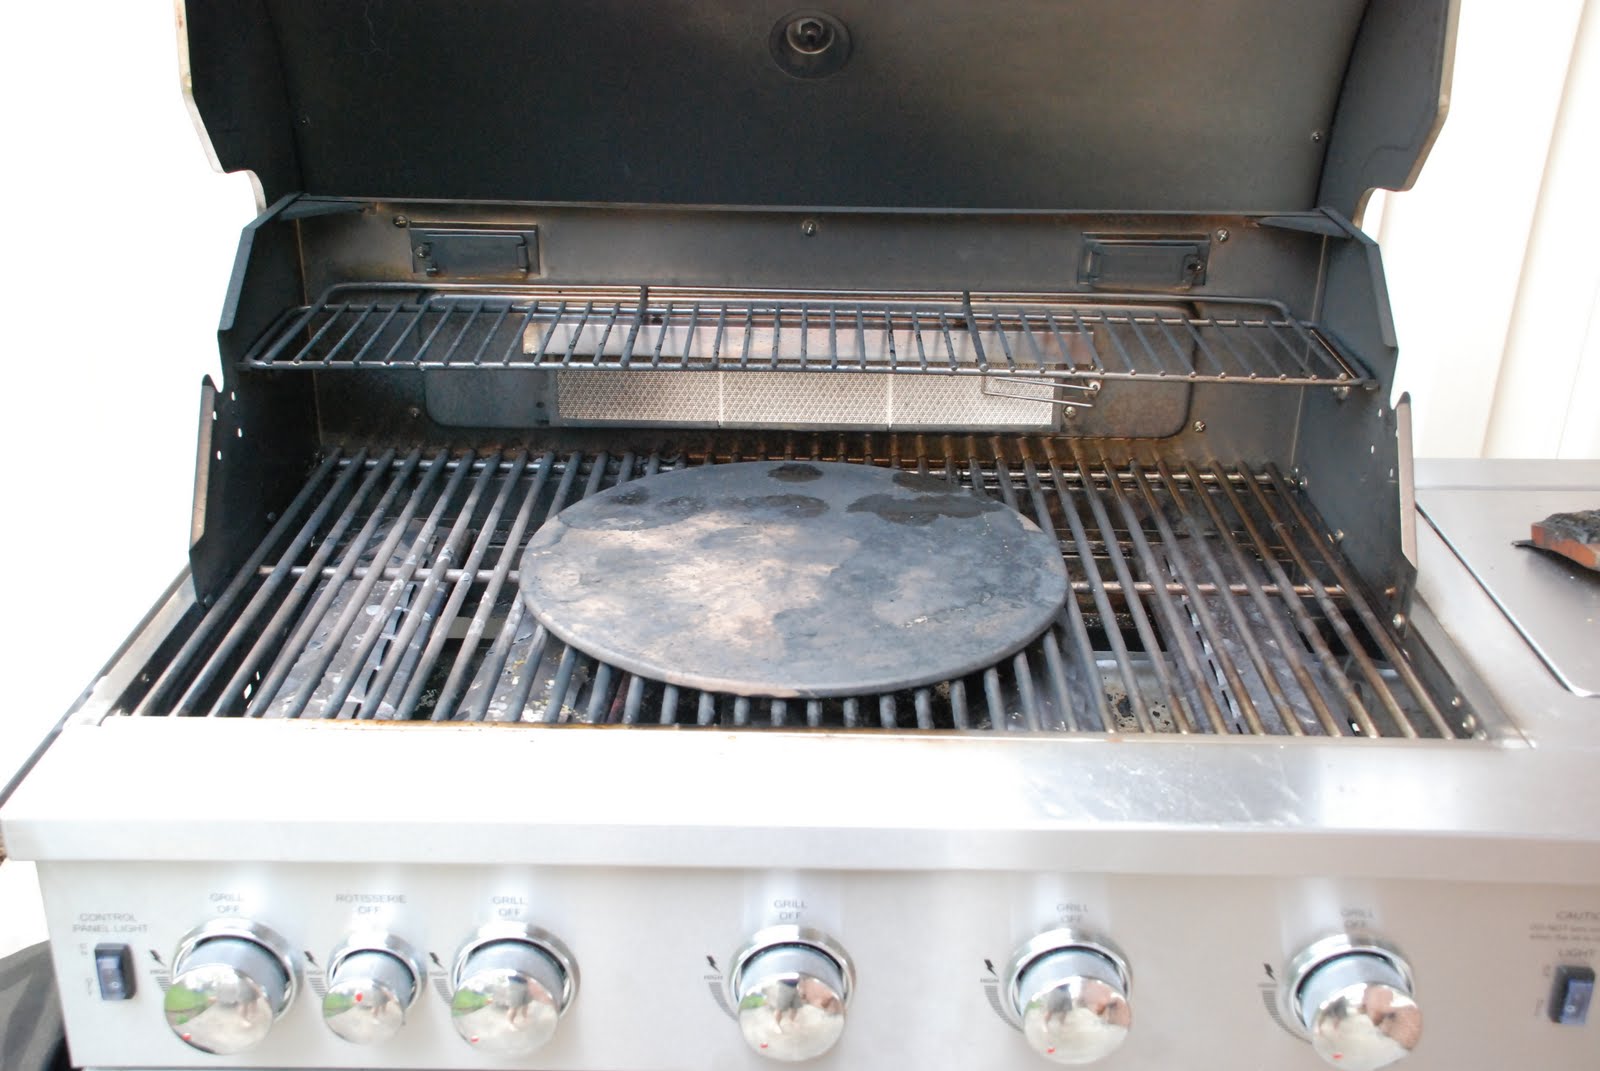
 Recently I have discovered the pizza screen. While the grill is heating up, I build the pizza right on the screen. (I discuss the technique for stretching the dough here.)

  The screen goes right on the stone for 2 minutes. After 2 minutes, I slide the peel in between the screen and the pizza so I can remove the screen and put the pizza directly on the stone. I also turn on the sear burner at the back of my grill and rotate the pizza over the next 2 minutes making sure all the edges have been cooked properly. With a little practice I have been able to get a good char on the bottom of the finished pizza.

  The whole cooking process takes about 4 minutes. You may want to use a timer because it doesn't take long to turn the pizza into a cinder at these temperatures. If you like NY style pizza, I guarantee you will love this pizza.

TTFN
B

Classic NY Style Pizzeria Pizza Sauce


  If you ask ten people what the best pizza sauce recipe is you'll get ten different answers. With that said, I couldn't really tell you what even I think the best pizza sauce is because there are so many variables and kinds of pizza to consider. Pizza can be as complicated or as simple as an individual wants to make it. We like simple and the following recipe definitely fits the bill. This recipe is based on the sauce we used at the pizzeria I worked at in State College PA when I was a student. This particular pizzeria was very popular at the time and people lined up down the street and around the corner in snow and rain on Friday and Saturday nights to get $1 slices and 25 cent refills. I think this sauce is fairly representative of all the NY Style pizzeria's I have frequented over the years and I like it enough to use it in my own home.

  The sauce is very thin by design and only enough to just cover the surface of the dough is needed. It shouldn't be running off the sides or pooling in the middle of the pie. In a properly heated pizza oven (575 to 800 degrees F), the sauce looses much of the excess moisture and the flavor concentrates somewhat. My home oven only heats to 550 degrees F and this sauce even works well at that temperature. Enjoy!

Classic NY Style Pizzeria Pizza Sauce
6 oz can tomato paste
2 1/2 cans of water
1 tsp dried oregano
1 tsp dried parsley
1 tbsp salt
1 tsp pepper
1 tsp garlic powder
1 tsp sugar

  Combine everything in a bowl and mix well. You can use it right away, but it has better flavor and body if you make it at least a day before you need it. It will keep at least a week in the fridge. This is also another great excuse to use fresh parsley and oregano from the garden. ;-)

TTFN
B

Wednesday, August 11, 2010

Gramma & Grampa's Pasta Sauce


This is a family recipe that I'll wager only family members will appreciate. It isn't a 15 generation Italian recipe that came to America on a boat. Nope, it was invented right here in the states by my Mother's parents and it was born out of the necessity to feed 6 children with what little money they had. I use the term recipe loosely because they didn't really follow a recipe when they made it. They just used whatever they could get their hands on and they put it all together in the same pot and cooked it for a long time. When it was ready it always had the same distinctive taste that still takes me back 35 years today. My mother, being the oldest, remembered many of the ingredients that were gathered to make the sauce, so it wasn't too difficult to recreate. Below is our rendition of this family recipe.

Gramma & Grampa's Pasta Sauce
10-12 quarts tomatoes, skinned and cored
1 large onion, chopped
24 oz tomato paste
2 lbs chicken hearts
2 lbs chicken gizzards
1 large pork bone or boney pork chop
1 chicken back or chicken thigh with the skin
10 cloves garlic, pressed
1/4 c salt
2 tbsp pepper
1/4 c sugar
1/2 c fresh oregano, chopped
1/4 c fresh parsley, chopped
1/2 c fresh basil, chopped
2 sprigs of rosemary
4 bay leaves
1/2 tbsp sage or poultry seasoning
3 tbsp extra virgin olive oil

Heat the oil in a 15 quart sauce pot. Add onions and pressed garlic to the pot to render the aromatics into the oil. This process should only take a few minutes. Do not scorch the garlic or onions. Add tomatoes. If using fresh tomatoes, crush them with your hands in the pot after they have been skinned and cored. We actually added 2 28oz cans of crushed tomatoes to the pot because we didn't have quite enough tomatoes from the garden. Fresh tomatoes are not a must and we used them because that is what we had. Add salt, pepper, sugar and herbs to the pot and bring to a boil. Stir often to avoid scorching. Lower heat and add all the meat and bones. Make sure you count the boney things that are added so you can fish them out later. Simmer uncovered for at least 8 hours and if using fresh tomatoes, at least 12 hours is needed. Stir at least every hour. The sauce will transform from a bright red runny mixture to a full bodied dark red sauce. When the sauce is done fish out the bones, bay leaves and rosemary sprigs(if you can find them).

If dried herbs are substituted, only use 1/3 the amount listed above. Most of the moisture has been removed from the dried herbs, so volumetrically they are not compatible. I would encourage everyone to use fresh herbs as often as possible, but I understand that isn't always easy.

As you can see from the picture, we decided to can this batch. The freezer tends to get crowded and with the new canner this became an option. We ended up with 10 quarts of sauce from a beginning volume of about 14 quarts. We'll see how it holds up. Enjoy! ;-)

TTFN
B

Sunday, August 1, 2010

Mel's Famous Brisket Tacos


My buddy Mel invited me over for dinner not too long ago and made his brisket tacos. He has been talking about these tacos for weeks and now that I have had them, I can see why. These things rock! If you like TexMex, then you will love these.

Taco Filling
5 lb brisket
1 c taco seasoning
2 jalapeno, sliced
1 tbsp black pepper
1 tsp salt
1 tsp red pepper flake
1 12oz can diced tomatoes (with green peppers and onions)
24 oz water
(3) ONLY (3) Drops of Da’Bomb Hot Sauce (1.5 Million Scoville)
1 can french fried onions

Sear the brisket. Mix taco seasoning, jalapeno, pepper, salt, pepper flakes, tomatoes, hot sauce and water in the base of a pressure cooker. Bring to a boil and remove from heat. Add brisket to pressure cooker. Cook the brisket in the pressure cooker for 45 minutes according to your cookers intructions.

When the brisket is done, remove it from the pot and shred the meat. Add the meat back into the pot and mix everything up well. Serve the filling in a soft tortilla with your favorite Chipotle BBQ sauce and French Fried Onions. Refried beans and Spanish Rice make great sides. For quick Spanish Rice, Mels adds a jar of salsa to almost ready minute rice and then covers it back up to finish the cooking process.

These were done very well and if I hadn't seen him make everything I may have thought he bought the food prepared from a good TexMex restaurant and pawned it off as his own.

TTFN
BTR

Saturday, July 10, 2010

Vegetable Lasagna


  The continuing saga of trying to find ways to use up all the zuchini and squash the summer months provide. We used Mom's regular pasta lasagna recipe and swapped a few things out, most notable was the zuchini and squash for the pasta. We also use ground turkey instead of hamburger or sausage because that was what we had in the freezer.

Vegetable Lasagna
7-8 c good tomato sauce (recipe)
6 c mozzarella cheese shredded
2 lbs ricotta cheese
2 eggs
2 lbs ground turkey browned and seasoned
3 medium zuchini's
4 medium squash
3/4 c fresh parsley chopped
1 tsp salt
1/2 tsp pepper

Preheat oven to 375 degrees farenheit. Slice zuchini and squash lengthwise in 1/4" thick pieces. Combine ricotta cheese, eggs, salt, pepper, parsley in a bowl. Mix well.


In a deep pyrex or stoneware baking dish layer the ingredients. We used a 13x9 stoneware baking dish. Put a layer of sauce (about a fourth), slices of zuchini and squash, meat (about a third), ricotta cheese mixture (about a third), mozarella (about a fourth). We got three layers in this pan. Finish with a layer of sauce and top with remaining mozzarella cheese. Bake covered with foil for 30 minutes then lower the temperature to 350 degrees farenheit and bake uncovered for 30 more minutes. Enjoy!

TTFN
B


Quick Tomato Sauce


My mother whipped this together one night and it was so good we will definitely make it again and put it on anything in need of a good tomato sauce.

Tomato Sauce
2 28 oz cans crushed tomatoes with basil
5 cloves garlic pressed
1 bay leaf
1 fresh rosemary branch
1/4 c chopped fresh basil
1/8 c chopped fresh oregano
4 tbsp extra virgin olive oil
2 tsp sugar
salt to taste
pepper to taste

Saute garlic in a sauce pan on medium heat for about 2 minutes. Add remaining ingredients and cook on medium high heat until it starts to bubble then back off to medium low heat for about 30 minutes more. Remove the rosemary and bay leaf. Makes about 8 cups. Enjoy!

I was surprised at the depth of flavor and substance this sauce had after such a short time. Definitely a keeper.

TTFN
B

Fried Green Tomatoes


  Fried green tomatoes may be food related to usage of all those green tomatoes that will go to waste if not eaten at the end of the growing season, but I have a whole bunch right now and I don't want to wait for 3 months. I have eaten them fried before, but never made them myself until now. Once again I looked at everyone elses recipes and used that information as the basis for my own.


Fried Green Tomatoes
3 large green tomatoes cut into 3/8" to 1/2" slices
2 c canola oil for frying
1 c panko crumbs
1/2 c corn meal
1 c flour
1 c milk
2 eggs beaten
salt
pepper

  Lay tomato slices out onto a cookie sheet or similar surface, salt and pepper each side and let sit for 15 minutes. Heat oil in a skillet on medium high. Setup a four station assembly line: milk first, flour, egg followed by panko and corn meal mixture. Plates work well for the dry ingredients and bowls for the wet. Take each tomato slice through the assembly line. Coat each one with milk, dredge in flour, coat with egg and finally dredge in panko and corn meal mixture. Fry in hot oil until golden brown, about 3 to 4 minutes on each side. Remove from oil and drain on paper towel. Season with salt as soon as they are removed from the oil. Serve with lemon wedges and hot sauce. They are pretty good with ketchup too. :-)

  This version came out very crunchy and will definitely be served here again.

TTFN
B

Thursday, June 24, 2010

Ratatouille with Quinoa


  Around our home anything that remotely resembles the recipe below is called Ratatouille. Maybe we're wrong, but one thing is for sure, if any combination of eggplant, peppers, tomatoes, yellow squash and zucchini is available, we cook it and call it the R-word. I'll list the ingredients for this version, but it isn't likely this exact recipe will be repeated here again. We even cook it different depending on the time of the year. In the summer we tend to use the stove top more and try to get it cooked relatively fast to avoid heating the kitchen up, but in the fall we make it in the oven and roast everything. As many ingredients as possible were used from the bucket garden.


Ratatouille with Quinoa
1 small Lavender eggplant cubed
2 small to medium zucchini cubed
3 small yellow squash cubed
3/4 medium white onion chopped
1 yellow bell pepper chopped (light green really ...)
4 plum tomatoes chopped (seeds removed)
1 14 oz can diced tomatoes
1/2 c canned mushrooms
2 cloves garlic (pressed)
1 1/2 c celery chopped (leaves and all)
6 tbsp extra virgin olive oil
1 bunch parsley chopped (reserve small amount for garnish)
1 small bunch oregano chopped
1 small bunch basil chopped
4 c cooked quinoa
grated mozzarella cheese
salt
pepper


  In a large skillet heat olive oil over medium heat. Add onions and garlic. Stir until soft and the aromatics are released. Add celery eggplant, and yellow squash. Lightly salt to help the vegetables to weep. Saute for 5 minutes. Add zucchini peppers and tomatoes. Once again, lightly salt. Saute for 5 minutes. Add additional salt and pepper to taste. Add parsley, oregano, basil and mushrooms. Stir well and simmer for 30 minutes. Stir occasionally. Serves 4. Plate over quinoa. Melt cheese on top. We use the microwave. Garnish with chopped parsley. Enjoy!

TTFN
B

Sunday, June 20, 2010

Quinoa Tabbouleh

 
  Or as we often see it here in the states, Tabouli. This dish absolutely screams spring and summer. I wasn't real familiar with this dish until very recently and I am so glad I was exposed to it. I have a lot of parsley to use up from the garden and I recently started using Quinoa just to check it out, so this event was timely. The recipe I was exposed to planted the Tabbouleh seed, but after some research it was immediately labeled inadequate. The recipe didn't call for enough parsley (Tabbouleh is a parsley salad after all) and it didn't have any lemon juice either, so I made my own recipe:


Quinoa Tabbouleh
1 c parsley (coarse chopped, flat leaf)
1/2 c cilantro (coarse chopped)
1 c quinoa (cooked and cooled)
1 med cucumber (coarse dice)
2 Roma tomatoes (seeds removed, coarse dice)
1/4 med onion (small diced)
5-6 mint leaves (coarse chopped)
1 clove garlic (garlic pressed)
2 tbsp lemon juice
6 tbsp extra virgin olive oil
1 tsp salt
1/2 tsp pepper

Mix ingredients well and serve chilled.

TTFN
B