Showing posts with label Pizza. Show all posts

Sunday, May 8, 2011

Grilled Breakfast Pizza


  This is fun to do and super yummy. It is common for us to go through the fridge on a Saturday or Sunday morning and use whatever is in there to make omelettes and the like. Seems fairly natural (to me) to do a pizza like this too. :-) This version really was conceived about an hour before we made it based on what we had lying around. Like omelettes, there are no hard and fast rules.

Grilled Breakfast Pizza
21 oz pizza dough ball (store bought or homemade)
3-4 oz thick sausage gravy, prepared
4 oz shredded cheddar 
4 small leftover potatoes, roughly cubed
1 medium onion, roughly sliced
2 Tbsp olive oil
6 eggs
1/2 lb browned sausage (recipe)
12 stalks barely cooked asparagus

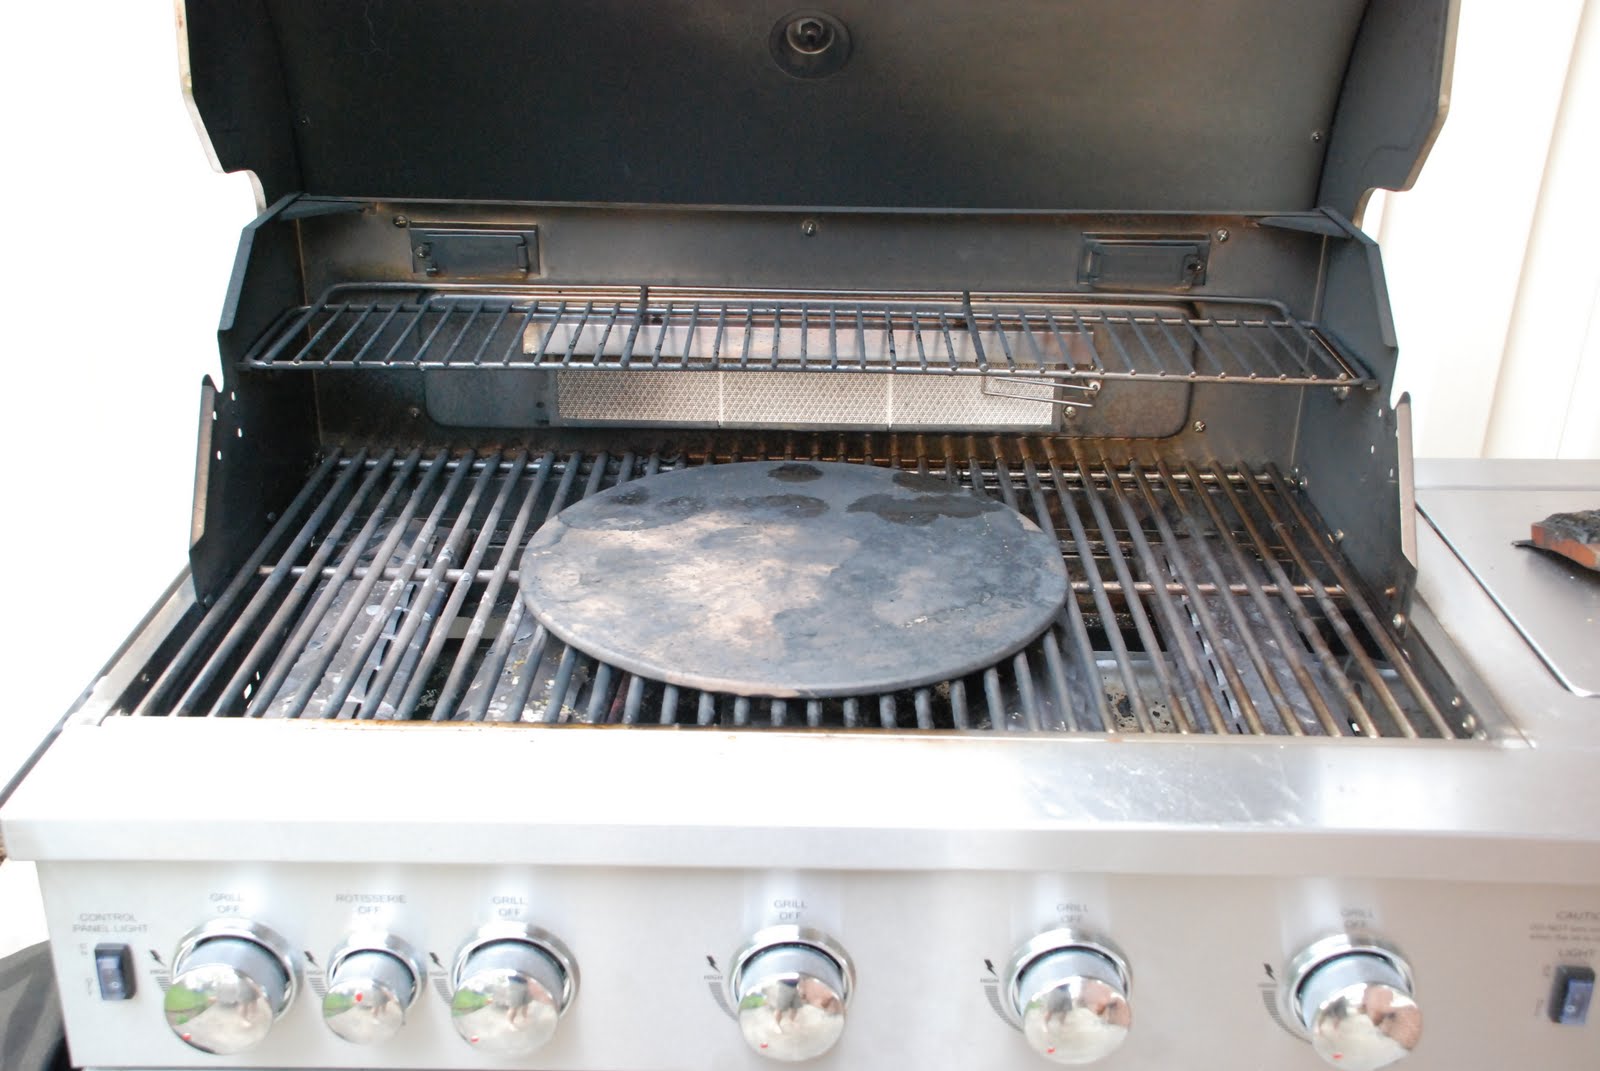
  Saute onions in olive oil until caramelized. Add potatoes and cook for another 5 minutes. Set aside. Preheat grill and pizza stone for 10 minutes with burners set at about medium. A more in depth discussion on cooking pizza on a grill can be found here. I built the pizza on a 16" pizza screen. The dough is stretched in to a 16" circle and layed on the screen. Cover with sausage gravy. Spread onion and potato mixture evenly. Spread cheese evenly. Spread sausage evenly. Use you fingers to make 6, evenly distributed, egg wells in the toppings. Don't press too hard or the screen will cut through the dough, just sorta move the toppings aside. Place an asparagus stalk on either side of each egg well, tips pointing in.

  Set a timer for 2 minutes and place the screen (and pizza) on the pre-heated pizza stone and close the grill lid. After two minutes, remove the screen (with pizza), and crack the 6 eggs into the prepared wells as quickly as you can and return to the grill. I turn on my sear burner at this point too. Set your timer for another 2 minutes. About every 20 seconds rotate the pizza 1/6 rotation so the sear burner doesn't burn your crust. Remove the pizza when the crust has a good char and the eggs are just barely cooked, about 4 minutes total. Cut the pizza into 6 pieces so that each piece has 1 egg and two asparagus stalks. Enjoy.

TTFN
B

Grilled Margherita Pizza


You haven't tasted pizza until you've tasted a real Margherita pizza. Wow ....

".... the classic story of the pizza Margherita. Modern pizza history was made in 1889 when Queen Margherita Teresa Giovanni, the consort of Umberto I, visited Naples with her king. Don Raffaele Esposito, who owned Pietro Il Pizzaiolo, was asked to prepare a special dish in honour of the Queen's visit. Esposito consulted his wife who was the real pizza expert and together they developed a pizza featuring tomatoes, mozzarella cheese, and basil. He named it the Margherita Pizza, after the city's guest of honor. " (recipepizza.com)

  Today, the cassic Margherita pizza is a simple pizza dough covered with crushed tomatoes, a sprinkle of sea salt, pinched pieces of fresh mozzarella cheese, fresh basil leaves, a sprinkle of grated parmesan cheese and a drizzle of olive oil. Traditionally the pizza is then baked in a wood fired oven at around 700 degrees F for about 90 seconds. Most of us can't touch those temperatures unless we have our own wood fired ovens, but I can get close enough with my outdoor grill to enjoy this classic pizza.
 
Grilled Margherita Pizza
21 oz pizza dough ball (store bought or homemade)
3-4 oz crushed tomatoes
8 oz fresh mozzerella
6-10 fresh basil leaves
generous pinch of sea salt
small handful grated parmesan cheese

  I heat my grill up with the 16 inch stone in the center (lid closed). I set the burner dials at about half. After 10 minutes the thermometer in the lid of my grill measures about 400 degrees F. I don't have an infrared thermometer, but I am pretty sure the stone is at least 600 degrees F.

 Recently I have discovered the pizza screen. While the grill is heating up, I build the pizza right on the screen. (I discuss the technique for stretching the dough here.)

  The screen goes right on the stone for 2 minutes. After 2 minutes, I slide the peel in between the screen and the pizza so I can remove the screen and put the pizza directly on the stone. I also turn on the sear burner at the back of my grill and rotate the pizza over the next 2 minutes making sure all the edges have been cooked properly. With a little practice I have been able to get a good char on the bottom of the finished pizza.

  The whole cooking process takes about 4 minutes. You may want to use a timer because it doesn't take long to turn the pizza into a cinder at these temperatures. If you like NY style pizza, I guarantee you will love this pizza.

TTFN
B

Pizzeria Pizza Dough


  Many years ago I made my own pizza dough at home. I was trying to re-create the dough we used at the pizza shop I worked at as a student, but I never really found what I was looking for and consequently when I discovered I could buy pizza dough balls at the grocery store I had to try them. It turns out they were pretty good and a whole lot less trouble too. But, I can't really take the complete home pizza journey unless I make my own dough. So, after all these years I finally found what I was looking for and I got a little help from an unexpected source. I knew what ingredients I wanted to use and I knew some of the relative amounts, but we used to make 45 doughs at a time at the pizza shop and scaling that down to 1 pizza dough was the real challenge I was facing. Thats where the unexpected help comes in: introducing ..... the Lehmann Pizza Dough Calculator (insert angelic voices here). This tool allowed me to quantify and tweak those ingredients and ratios until I finally found the dough of my dreams. :-)

  Now, having said all that, I am fairly old school when it comes to cooking and baking. I learned to cook using volumetric ratios (ya know, measuring cups and the like), but when it comes to dough, I think a scale is the only way to go (at least for the flour and water). If you want that extra measure of success, you really need to use a scale when it comes to bread and pizza dough.

Pizzeria Pizza Dough
12.82 oz ap flour (100%) (approximately 2 3/4 c)
7.82 oz water (61%)
.03 oz/ 1/4 tsp instant dry yeast (.21%)
.17 oz/ 1 tsp sea salt (1.32%)
.28 oz/ 2 tsp sugar (2.19%)

  I throw all these ingredients into my Kitchenaid mixer and combine with a dough hook for about 5 minutes. I then dump it on to my floured counter top and let it rest for 5 minutes. You should end up with a dough ball around 1.3 lbs that is soft and slightly tacky. This is adequate for a 16 or 18 inch pizza. For a 14 inch pizza you may want to try 1 lb dough balls. You could triple this recipe and cut the resulting mass into 4 pieces or you could use the Lehmann Pizza Dough Calculator (LPDC) to back calculate a 1 lb dough ball from the ratios listed above. Below is a shot of the LPDC in action:


  Ok, so you have a hunk of dough ... now what. This next piece is fairly important if you want to make a round pizza without any holes in it when you stretch it. Hold the dough with both hands and curl your fingers in toward the center of the dough ball while stretching the other side of the dough ball with your palms. Turn the dough a quarter turn and do the same curling motion again. Do this 3 or 4 times. If done correctly you should have a dough ball that is nice and smooth and tight on one side and messy and ragged with a hole in the middle on the other side. Pinch and twist all the ragged parts together in the center closing the hole. This ragged side will be the bottom of your dough ball. Place the dough ball (bottom side down) in a lightly oiled bowl and cover with saran wrap for a few hours to proof at room temperature. You can tell when the dough is done proofing because the dough will have relaxed significantly and it will have a bit of a sheen to it (see pics below). If you want to freeze the dough, stick it in a lightly oiled quart freezer bag to proof for a few hours and then stick it in the freezer in such a way as to preserve the shape of the ball until it is frozen.

Before proofing. Dough is semi-tight with no sheen.
After proofing. Dough has relaxed and has a bit of a sheen to it.

  I am not a big fan of the 'faster is better' philosophy, but sometimes you need to get things done a little quicker than normal. I have proofed this dough in as little as 45 minutes and had good results. For the fast proof method, use warm water when you make the dough and proof the dough in your oven that has been pre-heated to 100 degrees F (turn the oven off after pre-heating). Place the saran covered bowl (and dough) in the oven for 45-60 minutes.

  If you need a little help on stretching the dough to make a round pizza, I discuss this technique here.
 Enjoy!

TTFN
B

Classic NY Style Pizzeria Pizza Sauce


  If you ask ten people what the best pizza sauce recipe is you'll get ten different answers. With that said, I couldn't really tell you what even I think the best pizza sauce is because there are so many variables and kinds of pizza to consider. Pizza can be as complicated or as simple as an individual wants to make it. We like simple and the following recipe definitely fits the bill. This recipe is based on the sauce we used at the pizzeria I worked at in State College PA when I was a student. This particular pizzeria was very popular at the time and people lined up down the street and around the corner in snow and rain on Friday and Saturday nights to get $1 slices and 25 cent refills. I think this sauce is fairly representative of all the NY Style pizzeria's I have frequented over the years and I like it enough to use it in my own home.

  The sauce is very thin by design and only enough to just cover the surface of the dough is needed. It shouldn't be running off the sides or pooling in the middle of the pie. In a properly heated pizza oven (575 to 800 degrees F), the sauce looses much of the excess moisture and the flavor concentrates somewhat. My home oven only heats to 550 degrees F and this sauce even works well at that temperature. Enjoy!

Classic NY Style Pizzeria Pizza Sauce
6 oz can tomato paste
2 1/2 cans of water
1 tsp dried oregano
1 tsp dried parsley
1 tbsp salt
1 tsp pepper
1 tsp garlic powder
1 tsp sugar

  Combine everything in a bowl and mix well. You can use it right away, but it has better flavor and body if you make it at least a day before you need it. It will keep at least a week in the fridge. This is also another great excuse to use fresh parsley and oregano from the garden. ;-)

TTFN
B

Tuesday, June 15, 2010

Grilled Mediterranean Pizza

  Fresh basil and warm weather bring grilling and pesto to mind , so grilling a Mediterranean pizza isn't that far of a stretch. I haven't tried grilling pizza before, but it seemed a natural next step from making pizza in an oven not to mention it sounded like a whole bunch of fun. The following recipe turned out very well and will definitely be on the menu for this summer's entertaining.


Grilled Mediterranean Pizza
1/2 store bought pizza dough
1/2 c pesto sauce
1 c grated mozzarella cheese
1/2 c crumbled feta cheese
10 pitted Kalamata olives
1 sliced Roma tomato

Warm your grill on a low flame for about 5 minutes before starting to cook your pizza. I use gas. If you use charcoal you will have less control over the end product and the learning curve will be a bit longer, but friends tell me they prefer the taste they get from charcoal. Either way I am sure you will have fun.

I use a similar technique as explained here for managing the pizza dough. Since this is one half of a regular sized dough, the stretching process is a little different. I spread it as best I can with my hands and fingers and get roughly a football shaped pizza dough when finished.

When the grill is warmed and set on the lowest flame, flop the stretched dough on the center of the grilling surface. This process varies from grill to grill and the best term I can think of to explain it is flame management. You don't want to burn it, but you don't want raw dough either. Watch it and when you think the bottom has a nice color to it, spray the top of the dough with cooking spray and flip the entire pizza dough over by whatever means you see fit. I grab an end and flip it by hand.

Start spreading the pesto sauce and then evenly spread the mozzarella cheese on top. Next sprinkle the feta cheese and lay the tomatoes and olives on. While performing this step if I feel the dough is getting too well done I will shut the flame off until I am done putting the toppings on and then I will start the grill up again for the final step.

With all the toppings loaded, close the grill lid so the cheese can melt. This usually takes a few minutes. If burning the dough is a concern, shut the flame off and leave the lid closed until the pizza is done. If you have room on your grill, you can shut part of it off and put the pizza on that 'cool' part and shut the lid. It will act like an oven and heat the top without burning the bottom.

Enjoy!

TTFN
B.

Sunday, May 23, 2010

Pizza Night


One of the many skills I acquired in college was pizza making. I worked at a pizza shop for a short time and learned all I could about making the dough, sauce and pizza itself. This skill has served me well over the years and I have hosted many pizza parties and have gotten several compliments as well. I haven't made pizza in quite a while because of time constraints, but I noticed my local grocery store carries pre-made pizza dough balls in the refrigerated section and they are pretty good. Good enough to forgo the trouble of making my own pizza dough and easy enough to make pizza more often.

There are certain techniques and equipment you need to make real pizzeria style pizza at home. As far as equipment is concerned you will need a baking stone, a wooden pizza peel and an oven that can bake at 550F or higher. The restaurant I worked at kept their oven at 575F to 600F. I will discuss the techniques below as needed.

Pizza Sauce
6 oz can tomato paste
2 1/2 cans of water
1 tsp dried oregano
1 tsp dried parsley
1 tbsp salt
1 tsp pepper
1 tsp garlic powder
1 tsp sugar

Mix it all very well and put it in the fridge for a day before using it.

Cheese Pizza
pizza sauce (recipe above)
pizza dough (store bought or homemade)
corn meal (for the peel)
flour (for preparation)
mozzarella cheese

  Before making any pizza, put your pizza stone in the oven with only one rack located in the center at 550 degrees Farenheit. If your oven will go higher use any higher value up to 600 degrees farenheit. I usually do this first and then start preparing everything to actually make the pizza. Don't start making the pizza until your oven has reached the temperature you want to cook the pizza at because the stone needs to heat with the oven. This may take 30 minutes.
Spread corn meal on your peel.

  Stretch the dough to the size of your peel. This technique will take some time to master. Hopefully the pictures will help explain the process.

Start by flouring your working surface and both sides of the dough.

Press your fingers into the dough about one inch in from the edge all the way around.

With thumbs together, place the fingers of both hands into the indentation in the dough.

Spread your hands apart, turn the dough about 90 degrees ...

... repeat the process ...

... several times ...

... until the dough is spread out enough to drape over both fists.

Continue the same circular spreading motion with your fists ...

... as you did with your fingers above ...

... until the diameter of the dough is the size of your peel.


Lay the dough on the peel.

Spread your sauce on the dough. Do not press hard or your dough may stick to the peel.

Spread your cheese.

Place the peel near the back of the pizza stone and with tiny jerking motions slide the peel out from under the pizza leaving it centered as best you can on the stone. If the dough sticks to the peel at this stage you will have a gigantic mess ... take my word for it and don't let your dough stick to the wood! the corn meal should act like tiny ball bearings and the pizza should roll right off of the peel. The pizza will take about 6 minutes at 550 and 5 minutes at 600. At the 3 minute mark you can spin the pizza 180 degrees if your oven does not cook evenly.


Finished product.

White Pizza With Asparagus
alfredo sauce (Recipe)
pizza dough (store bought or homemade)
corn meal (for the peel)
handful of asparagus
flour (for preparation)
mozzarella cheese

I use a microwave as often as I can to cut down on prep time. Steaming vegetables is definitely one of those time saving activities.
I put my asparagus on a plate with a little water, cover with plastic wrap and microwave for 2 minutes. Dry the asparagus off and cut into thirds.

Follow the dough process from above.

Spread your sauce.

Spread your cheese and toppings

Slide the pizza off the peel.

Finished product.

If you decide to try pizza making, I would love to hear back from you.

TTFN

B.