Showing posts with label Spring. Show all posts

Sunday, November 6, 2011

Canned Cherries


 This past spring I was in canning mode and wanted to try cherries. My primary motivation was to be able to make a completely homemade cherry pie during the holidays. I used big plump bing cherries. I know ... I know ... I violated some kind of culinary law because I didn't use tart or sour cherries .... so what!

  The toughest part of the whole ordeal was pitting the cherries, but what can you do about it .. they have to come out. I got a cherry pitter from my local cooking gadget store and went to town. I started with about 20 lbs of cherries and it took me about 1.5 hours to get through them all. I washed them real good before starting and after I was done pitting. The rest is cake (or pie as it were).

Canned Cherries in Simple Syrup (7 quarts)
20 lbs cherries, pitted (about 3 lbs per quart)
10 c water
10 c sugar

  Combine equal parts water and sugar to form the simple syrup (also known as heavy syrup) in a large sauce pan on med high heat. Stir until sugar is dissolved. Just before the liquid boils turn the heat down to med low to stay hot. Fill your jars with cherries to the shoulder leaving at least an inch head room. Ladle hot syrup in to each jar covering cherries and leaving 1/2 inch head space. Release any air bubbles in the jar. Adjust two-piece canning lids. Process pints and quarts for 25 minutes in a boiling-water canner. Enjoy!

TTFN
B

Strawberry-Rhubarb Jam


Strawberry-Rhubarb Jam (about 6 half-pints)
2 c strawberries, roughly chopped
2 c rhubarb, chopped
1/4 c lemon juice
5 1/2 c sugar
1 c homemade pectin (recipe here)

Combine berries, rhubarb, pectin and lemon juice in a large sauce pan. Bring to a boil. Add sugar, stirring until dissolved. Bring to a boil. Boil hard for 1 minute stirring constantly. Skim foam if necessary. Ladle into hot sterilized canning jars leaving 1/4 inch head space. Adjust two-piece canning lids. Process 10 minutes in a boiling-water canner. Enjoy

Blueberry Jam


Blueberry Jam (about 6 half-pints)

4 1/2 c blueberries, roughly chopped
1/4 c lemon juice
5 c sugar
1 c homemade pectin (recipe here)

Combine berries, pectin and lemon juice in a large sauce pan. Bring to a boil. Add sugar, stirring until dissolved. Bring to a boil. Boil hard for 1 minute stirring constantly. Skim foam if necessary. Ladle into hot sterilized canning jars leaving 1/4 inch head space. Adjust two-piece canning lids. Process 15 minutes in a boiling-water canner. Enjoy!


TTFN
B

Strawberry Jam


Strawberry Jam (about 8 half-pints)
2 qts strawberries, roughly chopped
1/4 c lemon juice
7 c sugar
1 c homemade pectin (recipe here)

Crush chopped strawberries. Combine berries, pectin and lemon juice in a large sauce pan. Bring to a boil. Add sugar, stirring until dissolved. Bring to a boil. Boil hard for 1 minute stirring constantly. Skim foam if necessary. Ladle into hot sterilized canning jars leaving 1/4 inch head space. Adjust  two-piece canning lids. Process 10 minutes in a boiling-water canner. Enjoy!

TTFN
B

Homemade Pectin


  Pectin gives jellies and jams structure so they don't run all over the place. I don't mind the structure and I actually prefer it, but I do mind the preservatives that many of the packaged pectins seem to have not to mention the price. This year I decided to make my own pectin. Lo and behold, I am not the only one to ever think of it. Guess what? This is how they used to do it before you could buy it in a box or a tube! Imagine that!

  You need a bunch of green, unripened apples. When I say green apples I don't mean Granny Smith apples, I mean apple that are not ripe yet regardless of what color they will turn when they are ripe. It turns out green unripened apples are very high in natural pectin. I was able to get my apples from an old tree where I work that almost nobody even realizes is there. If you don't have your own orchard or know someone that does, chances are you can find an apple tree somewhere nearby that is in need of attention. And since it is early in the season when these apple are harvested, they are still in pretty good shape before the insects get hold of them later in the summer.


  The trick is to get the pectin concentrated and in a form you can add to your jelly and jam recipes. I washed the apples good, chopped them up in my food processor and cooked them down in the biggest pot I have. Drained the liquid off and canned it for later use. The process I used is located here. I have also reproduced the text found at this link below in case the original is ever deleted.

*******************************************************************
HOMEMADE PECTIN STOCK


From Harriet Fasenfest, Co-owner, Preserve

1. Put 3-4 pounds chopped apples in a non-reactive pan. Add enough water to barely cover apples and bring to a boil. Lower temperature immediately and let simmer until soft, approximately 20-30 minutes.

2. Pour apples and liquid through a fine sieve into a second pot. Without stirring, let this liquid drain overnight.

3. Bring liquid to a boil and cook until it has reduced to half its original volume.

4. Test pectin content (see instructions below) and continue to cook if necessary.

5. Once liquid pectin reaches the desired strength, store it in the fridge or freezer.

Testing the Pectin Level

I admit to loving this part. To determine the amount of pectin in your liquid, put 1 teaspoon of the liquid on a plate and add 2 tablespoons of rubbing alcohol to the mix. Swirl the mixture around until clots start to form. It will amaze you, but it will happen: You will know the strength of the pectin by the size of the clots.

You want a fairly large viscous clot to indicate strong pectin. Weak pectin will show up as several small, scattered clumps. If that is the case, bring the liquid back to a boil and reduce further. And toss out the test batch-you don't want to return that to the pot. Once the pectin reaches the desired strength, refrigerate, freeze, or can it until you make jam. It will keep in the fridge for up to one week.

Using Homemade Pectin

As a general guide, 2/3 cup of liquid pectin is enough to set 4 cups of low-pectin prepared fruit or fruit juice. Here again, you have room for whimsy. If you use strawberries (low in pectin) alone, use the full amount of liquid pectin. If you throw in a few currants (high in pectin) with the strawberries, use less liquid pectin. If you use half currants and half strawberries, you might not need any liquid pectin at all.

In the end, willingness to learn by trial and error and to love whatever the outcome is what will win the day.

Posted by Deborah Kane on March 2, 2007 11:55 AM
Permalink
*******************************************************************
 
TTFN
B

Sunday, June 12, 2011

Strawberry Swirl Cream Cheese Pound Cake


  We are always on the lookout for food related ideas and recipes. A few weeks ago we found this recipe in Southern Living magazine. Strawberry season had just started and this recipe was the perfect excuse to use some of the local berries that we were starting to see at all the Amish stands

Strawberry Swirl Cream Cheese Pound Cake
1 1/2 c butter, softened
3 c sugar
1 (8-oz.) package cream cheese, softened
6 large eggs
3 c all-purpose flour
1 tsp almond extract
1/2 tsp vanilla extract
2/3 c strawberry glaze
1 (6-inch) wooden skewer

Strawberry Glaze
1 c ripe strawberries, finely chopped
1/2 c sugar
4 1/2 tsp corn starch
1/4 c cool water
1 tbsp butter
2 tsp lemon juice

Prepare glaze. We chopped our berries very fine in a food processor. Dissolve corn starch in water. Combine chopped strawberries, sugar and corn starch mixture in a medium sauce pan. Cook over medium heat until the mixture boils and thickens somewhat. Remove from heat and stir in lemon juice and butter. Cool in fridge for 15-20 minutes. While the glaze is cooling, move on to the cake batter.

Preheat oven to 350°. Beat butter at medium speed with a heavy-duty electric stand mixer until creamy. Gradually add sugar, beating at medium speed until light and fluffy. Add cream cheese, beating until creamy. Add eggs, 1 at a time, beating just until blended after each addition.

Gradually add flour to butter mixture. Beat at low speed just until blended after each addition, stopping to scrape bowl as needed. Stir in almond and vanilla extracts. Pour one-third of batter into a greased and floured 10-inch (14-cup) tube pan (about 2 2/3 cups batter). Dollop 8 rounded teaspoonfuls strawberry glaze over batter, and swirl with wooden skewer. Repeat procedure once, and top with remaining third of batter.

Bake at 350° for 1 hour to 1 hour and 10 minutes or until a long wooden pick inserted in center comes out clean. Cool in pan on a wire rack 10 to 15 minutes; remove from pan to wire rack, and cool completely (about 1 hour).

We enjoyed the cake and of course we made some extra glaze to serve on top with whipped cream. Enjoy!

TTFN
B

Monday, May 30, 2011

Greek Yogurt With Macerated Blueberries and Strawberries


  This simple and appropriately colored dish is a refreshing and somewhat healthy snack or dessert. By the way, happy Memorial Day to everyone and a great big Thank You to our veterans and soldiers both living and deceased!

Greek Yogurt With Macerated Blueberries and Strawberries
1/2 c Greek yogurt
3 tbsp sugar
1/4 c strawberries, sliced
1/4 c blueberries

  Macerate the berries by adding 2 of the tbsp of sugar to the berries, mix well and let sit for 20 minutes. Mix the remaining tbsp of sugar into the yogurt. Once the berries are nice and juicy, put half the berry mixture in the bottom of your bowl, cover with yogurt and put the remaining berry mixture on top. Enjoy! :-)

  A quick word about Greek yogurt. Unless you get the yogurt from Greece, it won't really be much different than regular yogurt except the majority of the whey will have been removed to get the thicker consistency associated with Greek style yogurt. With that said, if you take regular yogurt and drain the whey out by using a coffee filter and a colander, you will get a very similar result. Simply put a coffee filter in a colander and put the yogurt in the coffee filter. Put a bowl under the whole contraption to catch the whey. You can use the whey for other recipes if you like. The process takes a few hours and I typically do it overnight in the fridge. I have been using this technique for years for baked potato topping, sauces, dips and dressings. It really is a great substitute for sour cream.

TTFN
B

Tuesday, May 24, 2011

2011 Bucket Garden Update 2


  Everything is flowering and all things green are flourishing. What a beautiful time of the year.

Even our roses are blossoming.

The garden plants are no exception. We have had a few losses over the last few weeks, but overall I am pleased. The Chinese Five Color Pepper plants have sprouted up all over the original container they came in and I expect we will give a few of these away this year as gifts. These ornamental pepper plants are very colorful. It is very satisfying to watch all of these plants grow from seed and I can't wait to make some of my favorite summer dishes from our garden harvests.

TTFN
B

Mild Italian Link Sausage

 
  Who doesn't like sausage? The only thing I dislike about store bought sausage is most of it contains MSG (or natural salt if you want to be evasive). An allergy to MSG prevents some of our family from partaking in MSG laden foods, so we have to take matters in to our own hands when it comes to things like sausage. Preparing this sausage is a little extra work, but very satisfying in the end. I recommend doing as much sausage making as you can while all the sausage making gear is out. It isn't hard and maybe this entry will push you over the edge to try it yourself.

Mild Italian Link Sausage
2 lbs pork butt (with fat)
2 tsp kosher salt (or sea salt)
1 1/2 tsp black pepper, ground
1/2 tsp garlic powder
1 tbsp dried parsley
1 1/2 tsp fennel seed, ground
5 ft natural casing

For Hot Sausage Add:
2 1/2 tsp paprika, ground
1/4 tsp anise seed, ground
2 tsp red pepper flakes

  Mix all seasoning ingredients together. Cut the pork into chunks. Mix the pork and seasonings together. Grind the pork mixture with your choice of meat grinding hardware.

  Our choice of sausage stuffing and grinding hardware was the sausage attachments for our KitchenAid mixer. We used the fine die on the mixer for grinding, but recommend using the course or large die. The next time we do this we will definitely use the larger die for grinding. Once the pork is ground, refrigerate the mixture for at least an hour while preparing the casings. The mixture should be cold while stuffing the sausage.

  We used natural casings obtained from a local kitchen store. The package is fairly small and could easily be ordered from the internet if you cannot find it locally. You may want to consider using collagen casings instead of the natural casings if that is more to your liking. There is a lot of information on the internet about the different kinds of sausage casings and plenty of places to order them from. Any leftover casings can easily be stored either in your pantry or refrigerator depending on the type you choose. To prepare our casings we had to soak them in warm water and rinse them thoroughly.

  When the ground pork mixture was chilled for an hour, I tied one end of a prepared casing into a knot and slid the other end on to the sausage making tip all the way up to the knotted end. I turned on the mixer and started stuffing the ground pork mixture into the hopper which feeds an auger which eventually pushes the pork in to the casing. Continue until the casing is completely full or you run out of meat.

This particular batch was grilled with sweet onions and peppers and served on a soft italian roll.
A few things we learned along the way:
- Any left over natural casings can be stored in your refrigerator, sealed in the original bag completely covered in salt for up to a year.
- To clean out the auger after making the sausage, send a few pieces of bread through the system to push out any left over meat. This greatly simplified the cleanup.

Enjoy!

TTFN
B

Sunday, May 8, 2011

Grilled Margherita Pizza


You haven't tasted pizza until you've tasted a real Margherita pizza. Wow ....

".... the classic story of the pizza Margherita. Modern pizza history was made in 1889 when Queen Margherita Teresa Giovanni, the consort of Umberto I, visited Naples with her king. Don Raffaele Esposito, who owned Pietro Il Pizzaiolo, was asked to prepare a special dish in honour of the Queen's visit. Esposito consulted his wife who was the real pizza expert and together they developed a pizza featuring tomatoes, mozzarella cheese, and basil. He named it the Margherita Pizza, after the city's guest of honor. " (recipepizza.com)

  Today, the cassic Margherita pizza is a simple pizza dough covered with crushed tomatoes, a sprinkle of sea salt, pinched pieces of fresh mozzarella cheese, fresh basil leaves, a sprinkle of grated parmesan cheese and a drizzle of olive oil. Traditionally the pizza is then baked in a wood fired oven at around 700 degrees F for about 90 seconds. Most of us can't touch those temperatures unless we have our own wood fired ovens, but I can get close enough with my outdoor grill to enjoy this classic pizza.
 
Grilled Margherita Pizza
21 oz pizza dough ball (store bought or homemade)
3-4 oz crushed tomatoes
8 oz fresh mozzerella
6-10 fresh basil leaves
generous pinch of sea salt
small handful grated parmesan cheese

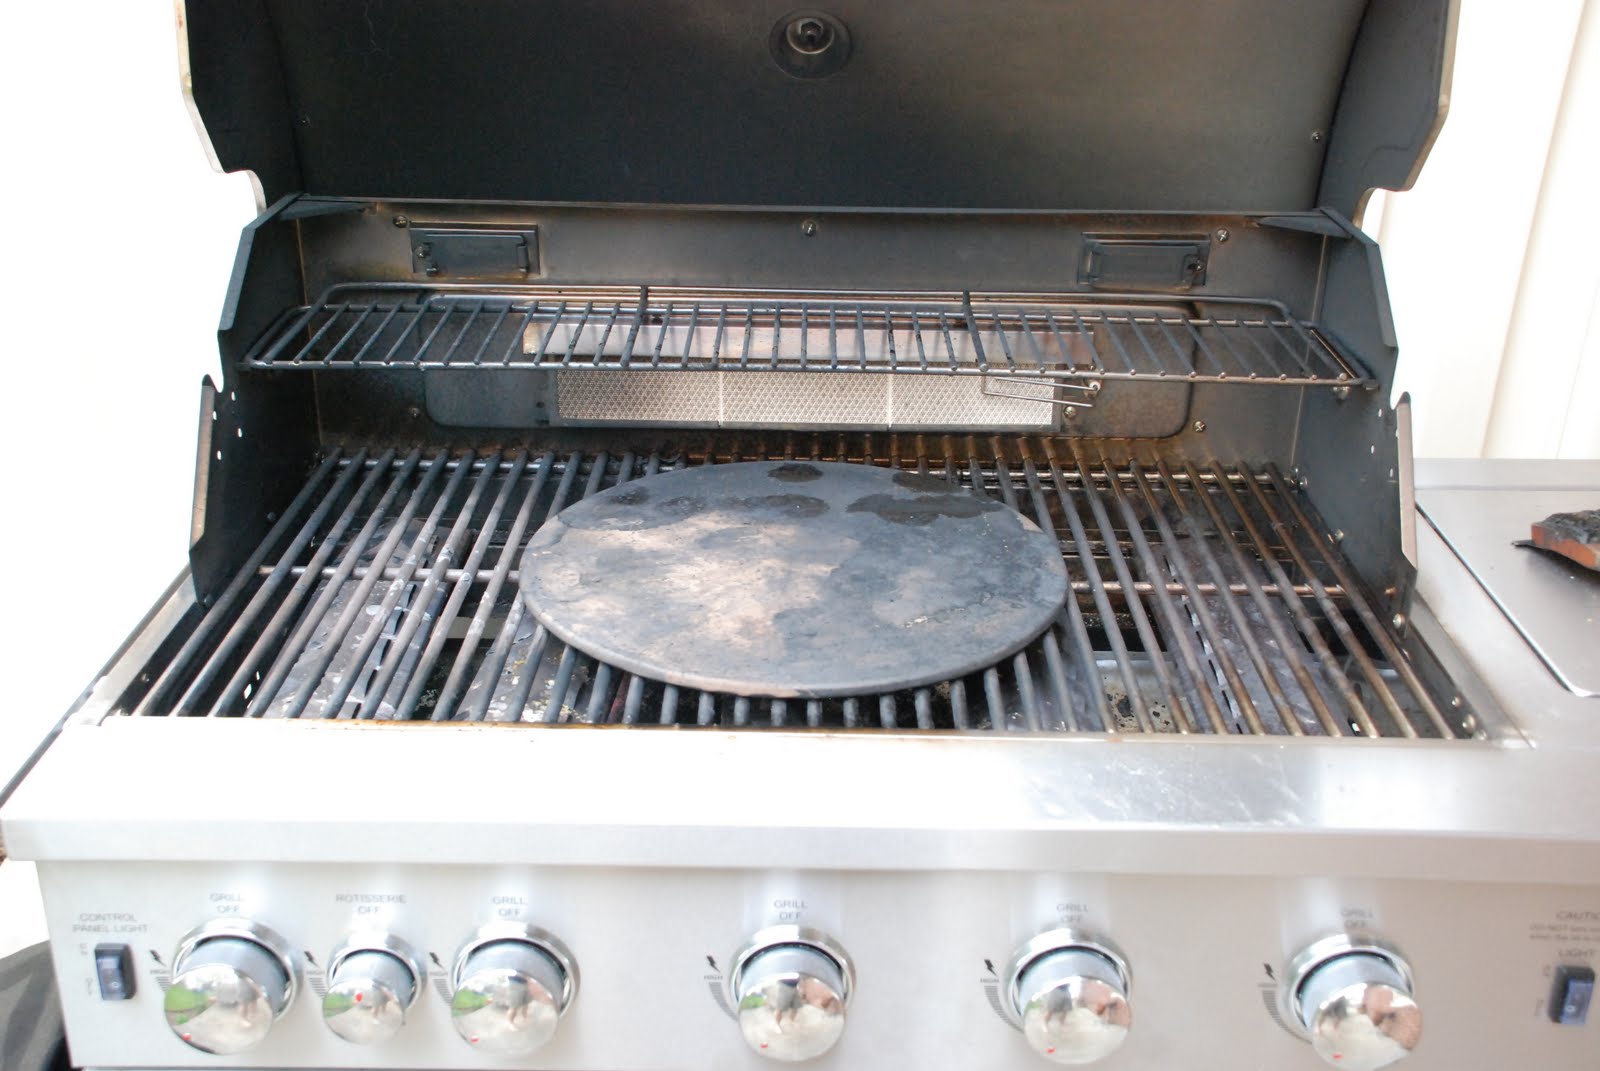
  I heat my grill up with the 16 inch stone in the center (lid closed). I set the burner dials at about half. After 10 minutes the thermometer in the lid of my grill measures about 400 degrees F. I don't have an infrared thermometer, but I am pretty sure the stone is at least 600 degrees F.

 Recently I have discovered the pizza screen. While the grill is heating up, I build the pizza right on the screen. (I discuss the technique for stretching the dough here.)

  The screen goes right on the stone for 2 minutes. After 2 minutes, I slide the peel in between the screen and the pizza so I can remove the screen and put the pizza directly on the stone. I also turn on the sear burner at the back of my grill and rotate the pizza over the next 2 minutes making sure all the edges have been cooked properly. With a little practice I have been able to get a good char on the bottom of the finished pizza.

  The whole cooking process takes about 4 minutes. You may want to use a timer because it doesn't take long to turn the pizza into a cinder at these temperatures. If you like NY style pizza, I guarantee you will love this pizza.

TTFN
B

2011 Bucket Garden Update 1


  Well, seeds are planted, soil has been prepared and the buckets are being cleaned up for another round of container gardening. Actually, this photo is about a week old and the majority of the plants in the foreground have already been moved to larger pots and are coming along nicely.
  One of the biggest surprises so far are the seeds I saved from the sweet peppers we get from Costco. They have all germinated and so far are the only peppers out of about 10 varieties I started from seed that have done so. I didn't know much about these peppers (other than we really like them) when I saved the seeds. I didn't even know if they were hybrid or heirloom or even if they would grow from seed at all. They are so tasty that I figured they must be some kind of hybrid and I didn't really expect much from them. I have since discovered they are called 'Sweet Pickle Peppers' and they are an heirloom variety which means we will be saving seeds from these plants again for next year. They have germinated so quickly and they taste so good I wonder if they are disease prone or insect magnets. I guess we'll find out. :-)
  All of the basil has popped up as well and with all the pizza action going on around here lately, it is a good thing. Most of the tomatoes have done very well and we certainly look forward to eating some of the new varieties we have come accross this spring. I have several colorful dishes in mind for all the varieties of tomatoes and peppers we are growing this year. I can't wait ... :-)

TTFN
B

Tuesday, November 23, 2010

Drago's Charbroiled Oysters


    If you ever get to New Orleans, I highly recommend you stop in at Drago's for some charbroiled oysters. Several months ago I was in New Orleans on business and I ate these every night I was there. Lately I have been jonesing for them again and when my aunt offered to bring a bushel of oysters back from the Carolinas, I knew exactly what to do with them.

Drago's Charbroiled Oysters (Makes 8 servings or if you are me, just 1 serving)
32 oysters on the half shell
1 c butter
2 lg cloves garlic, pressed
1/2 tsp ground black pepper
1/4 c grated Parmesan cheese
1/4 c grated Pecorino Ramano cheese
1/2 c fresh parsley, finely chopped

  Heat your grill to medium high heat. Melt butter in a sauce pan. Add garlic and pepper to butter. Mix cheeses together in a bowl. Spoon melted butter mixture into each oyster. Add a pinch of cheese mixture. Add a pinch of parsley. Grill for 8 minutes until hot and bubbly. Enjoy! :-)

TTFN
B

Sunday, June 20, 2010

Quinoa Tabbouleh

 
  Or as we often see it here in the states, Tabouli. This dish absolutely screams spring and summer. I wasn't real familiar with this dish until very recently and I am so glad I was exposed to it. I have a lot of parsley to use up from the garden and I recently started using Quinoa just to check it out, so this event was timely. The recipe I was exposed to planted the Tabbouleh seed, but after some research it was immediately labeled inadequate. The recipe didn't call for enough parsley (Tabbouleh is a parsley salad after all) and it didn't have any lemon juice either, so I made my own recipe:


Quinoa Tabbouleh
1 c parsley (coarse chopped, flat leaf)
1/2 c cilantro (coarse chopped)
1 c quinoa (cooked and cooled)
1 med cucumber (coarse dice)
2 Roma tomatoes (seeds removed, coarse dice)
1/4 med onion (small diced)
5-6 mint leaves (coarse chopped)
1 clove garlic (garlic pressed)
2 tbsp lemon juice
6 tbsp extra virgin olive oil
1 tsp salt
1/2 tsp pepper

Mix ingredients well and serve chilled.

TTFN
B

Tuesday, June 15, 2010

Grilled Mediterranean Pizza

  Fresh basil and warm weather bring grilling and pesto to mind , so grilling a Mediterranean pizza isn't that far of a stretch. I haven't tried grilling pizza before, but it seemed a natural next step from making pizza in an oven not to mention it sounded like a whole bunch of fun. The following recipe turned out very well and will definitely be on the menu for this summer's entertaining.


Grilled Mediterranean Pizza
1/2 store bought pizza dough
1/2 c pesto sauce
1 c grated mozzarella cheese
1/2 c crumbled feta cheese
10 pitted Kalamata olives
1 sliced Roma tomato

Warm your grill on a low flame for about 5 minutes before starting to cook your pizza. I use gas. If you use charcoal you will have less control over the end product and the learning curve will be a bit longer, but friends tell me they prefer the taste they get from charcoal. Either way I am sure you will have fun.

I use a similar technique as explained here for managing the pizza dough. Since this is one half of a regular sized dough, the stretching process is a little different. I spread it as best I can with my hands and fingers and get roughly a football shaped pizza dough when finished.

When the grill is warmed and set on the lowest flame, flop the stretched dough on the center of the grilling surface. This process varies from grill to grill and the best term I can think of to explain it is flame management. You don't want to burn it, but you don't want raw dough either. Watch it and when you think the bottom has a nice color to it, spray the top of the dough with cooking spray and flip the entire pizza dough over by whatever means you see fit. I grab an end and flip it by hand.

Start spreading the pesto sauce and then evenly spread the mozzarella cheese on top. Next sprinkle the feta cheese and lay the tomatoes and olives on. While performing this step if I feel the dough is getting too well done I will shut the flame off until I am done putting the toppings on and then I will start the grill up again for the final step.

With all the toppings loaded, close the grill lid so the cheese can melt. This usually takes a few minutes. If burning the dough is a concern, shut the flame off and leave the lid closed until the pizza is done. If you have room on your grill, you can shut part of it off and put the pizza on that 'cool' part and shut the lid. It will act like an oven and heat the top without burning the bottom.

Enjoy!

TTFN
B.

Basil Cilantro Pesto

  With plenty of basil and cilantro coming out of the garden, some experimentation was in order. After a little research I came up with the following recipe:


Basil Cilantro Pesto
2/3 c packed basil leaves (washed)
2/3 c packed cilantro stalk and leaves (washed)
1/3 c grated Parmesan cheese
1 tbsp roasted sunflower seeds (instead of pine nuts)
1/2 tsp salt
1/4 tsp pepper
1 clove garlic
1/2 c extra virgin olive oil

Blend the first 7 ingredients in a food processor (about a minute). With the food processor running, slowly drizzle the olive oil into the mixture (about a minute).

I was really happy with this recipe and will definitely make it again. There are plenty of uses for pesto including pasta sauce, pizza sauce and crusty bread topper to name a few.

TTFN

B.